Emily w
Tubular Cast on for 1×1 Rib
This cast on is my preferred cast on for 1×1 rib. It gives a really stretchy edge, with good recovery. While it does take a little practice to get the tension right, it is worth the effort. The first two setup rows are worked flat, and then if desired the work is joined in the round at the start of the third row – the join is completed using the yarn tail. The cast on produces an even number of stitches – if you need an odd number cast on one extra and then decrease once the cast on is complete.
Paired decrease in 1×1 rib (prd)
The Paired decrease in 1×1 rib (prd) is a reversible double decrease, worked over four stitches (resulting in 2 stitches). Always begin the decrease on a knit stitch. First the stitches are rearranged on the needles so that the two knits and the two purls sit next to each other, before knitting them together. This results in the columns of knits and purls meeting neatly on both the front and the back of the knitting, with no gaps or holes visible.
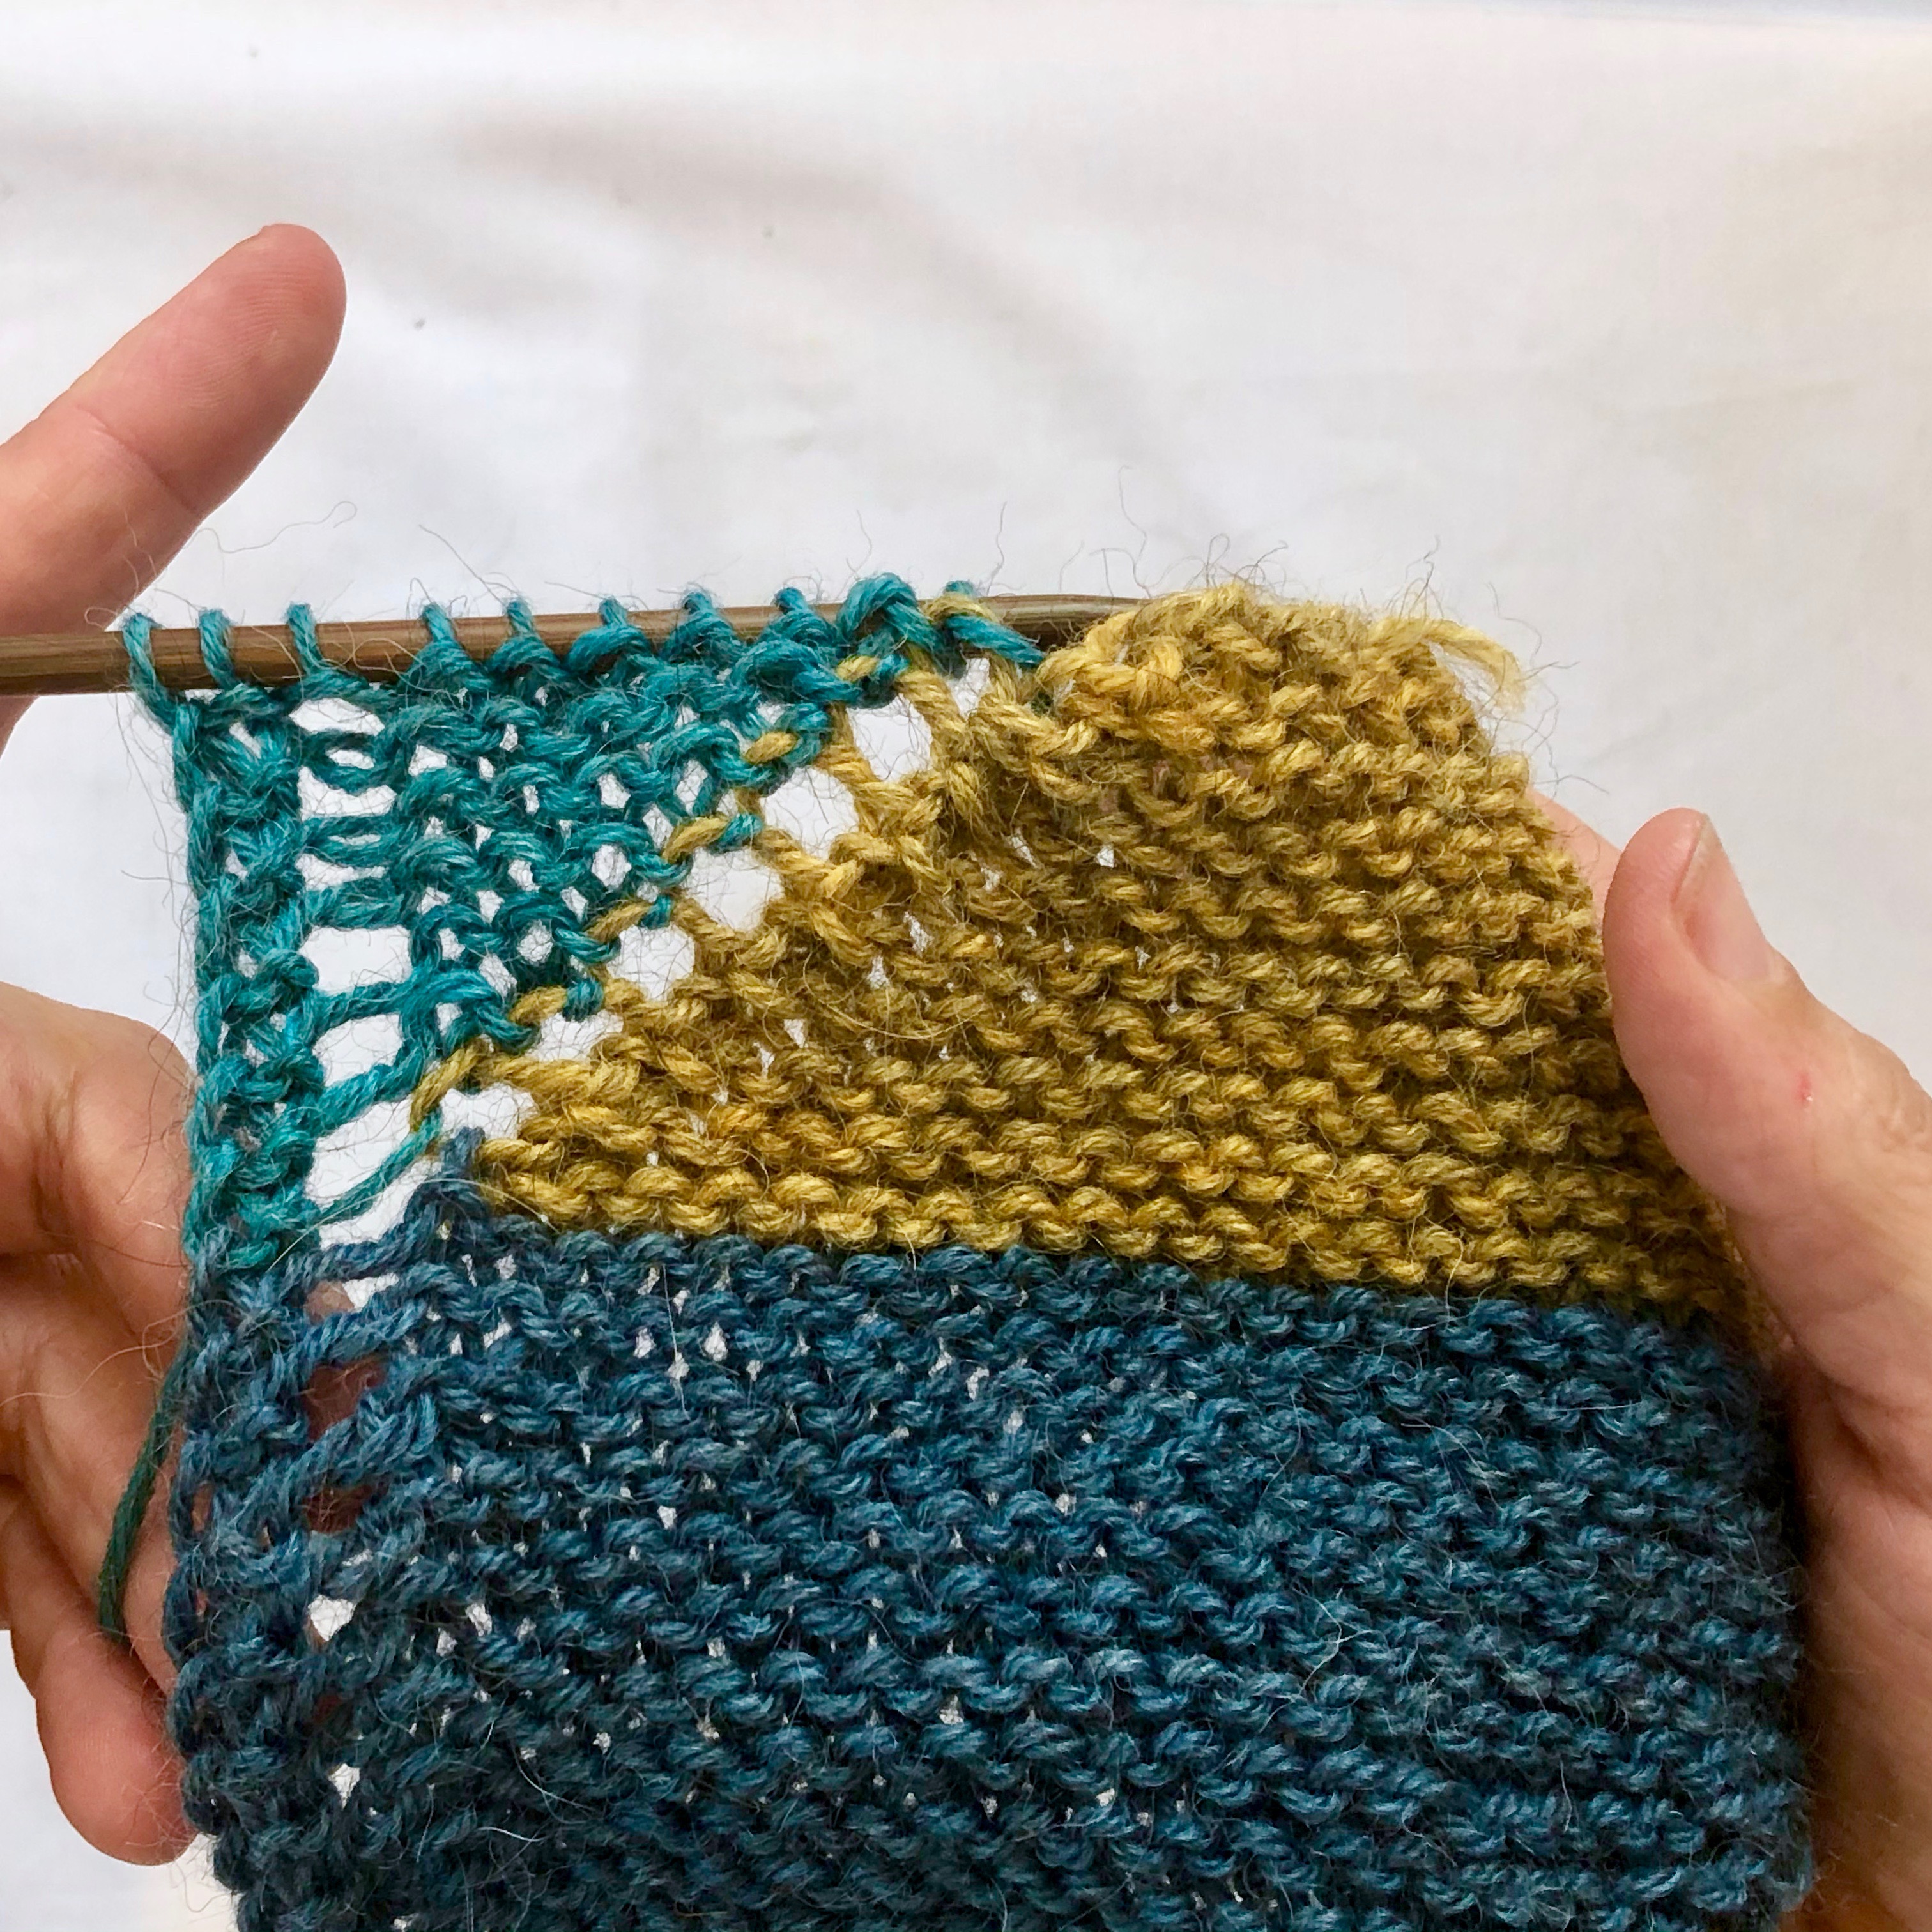
Stitchill Shawl – joining using yarn overs
posted on: October 8th, 2019
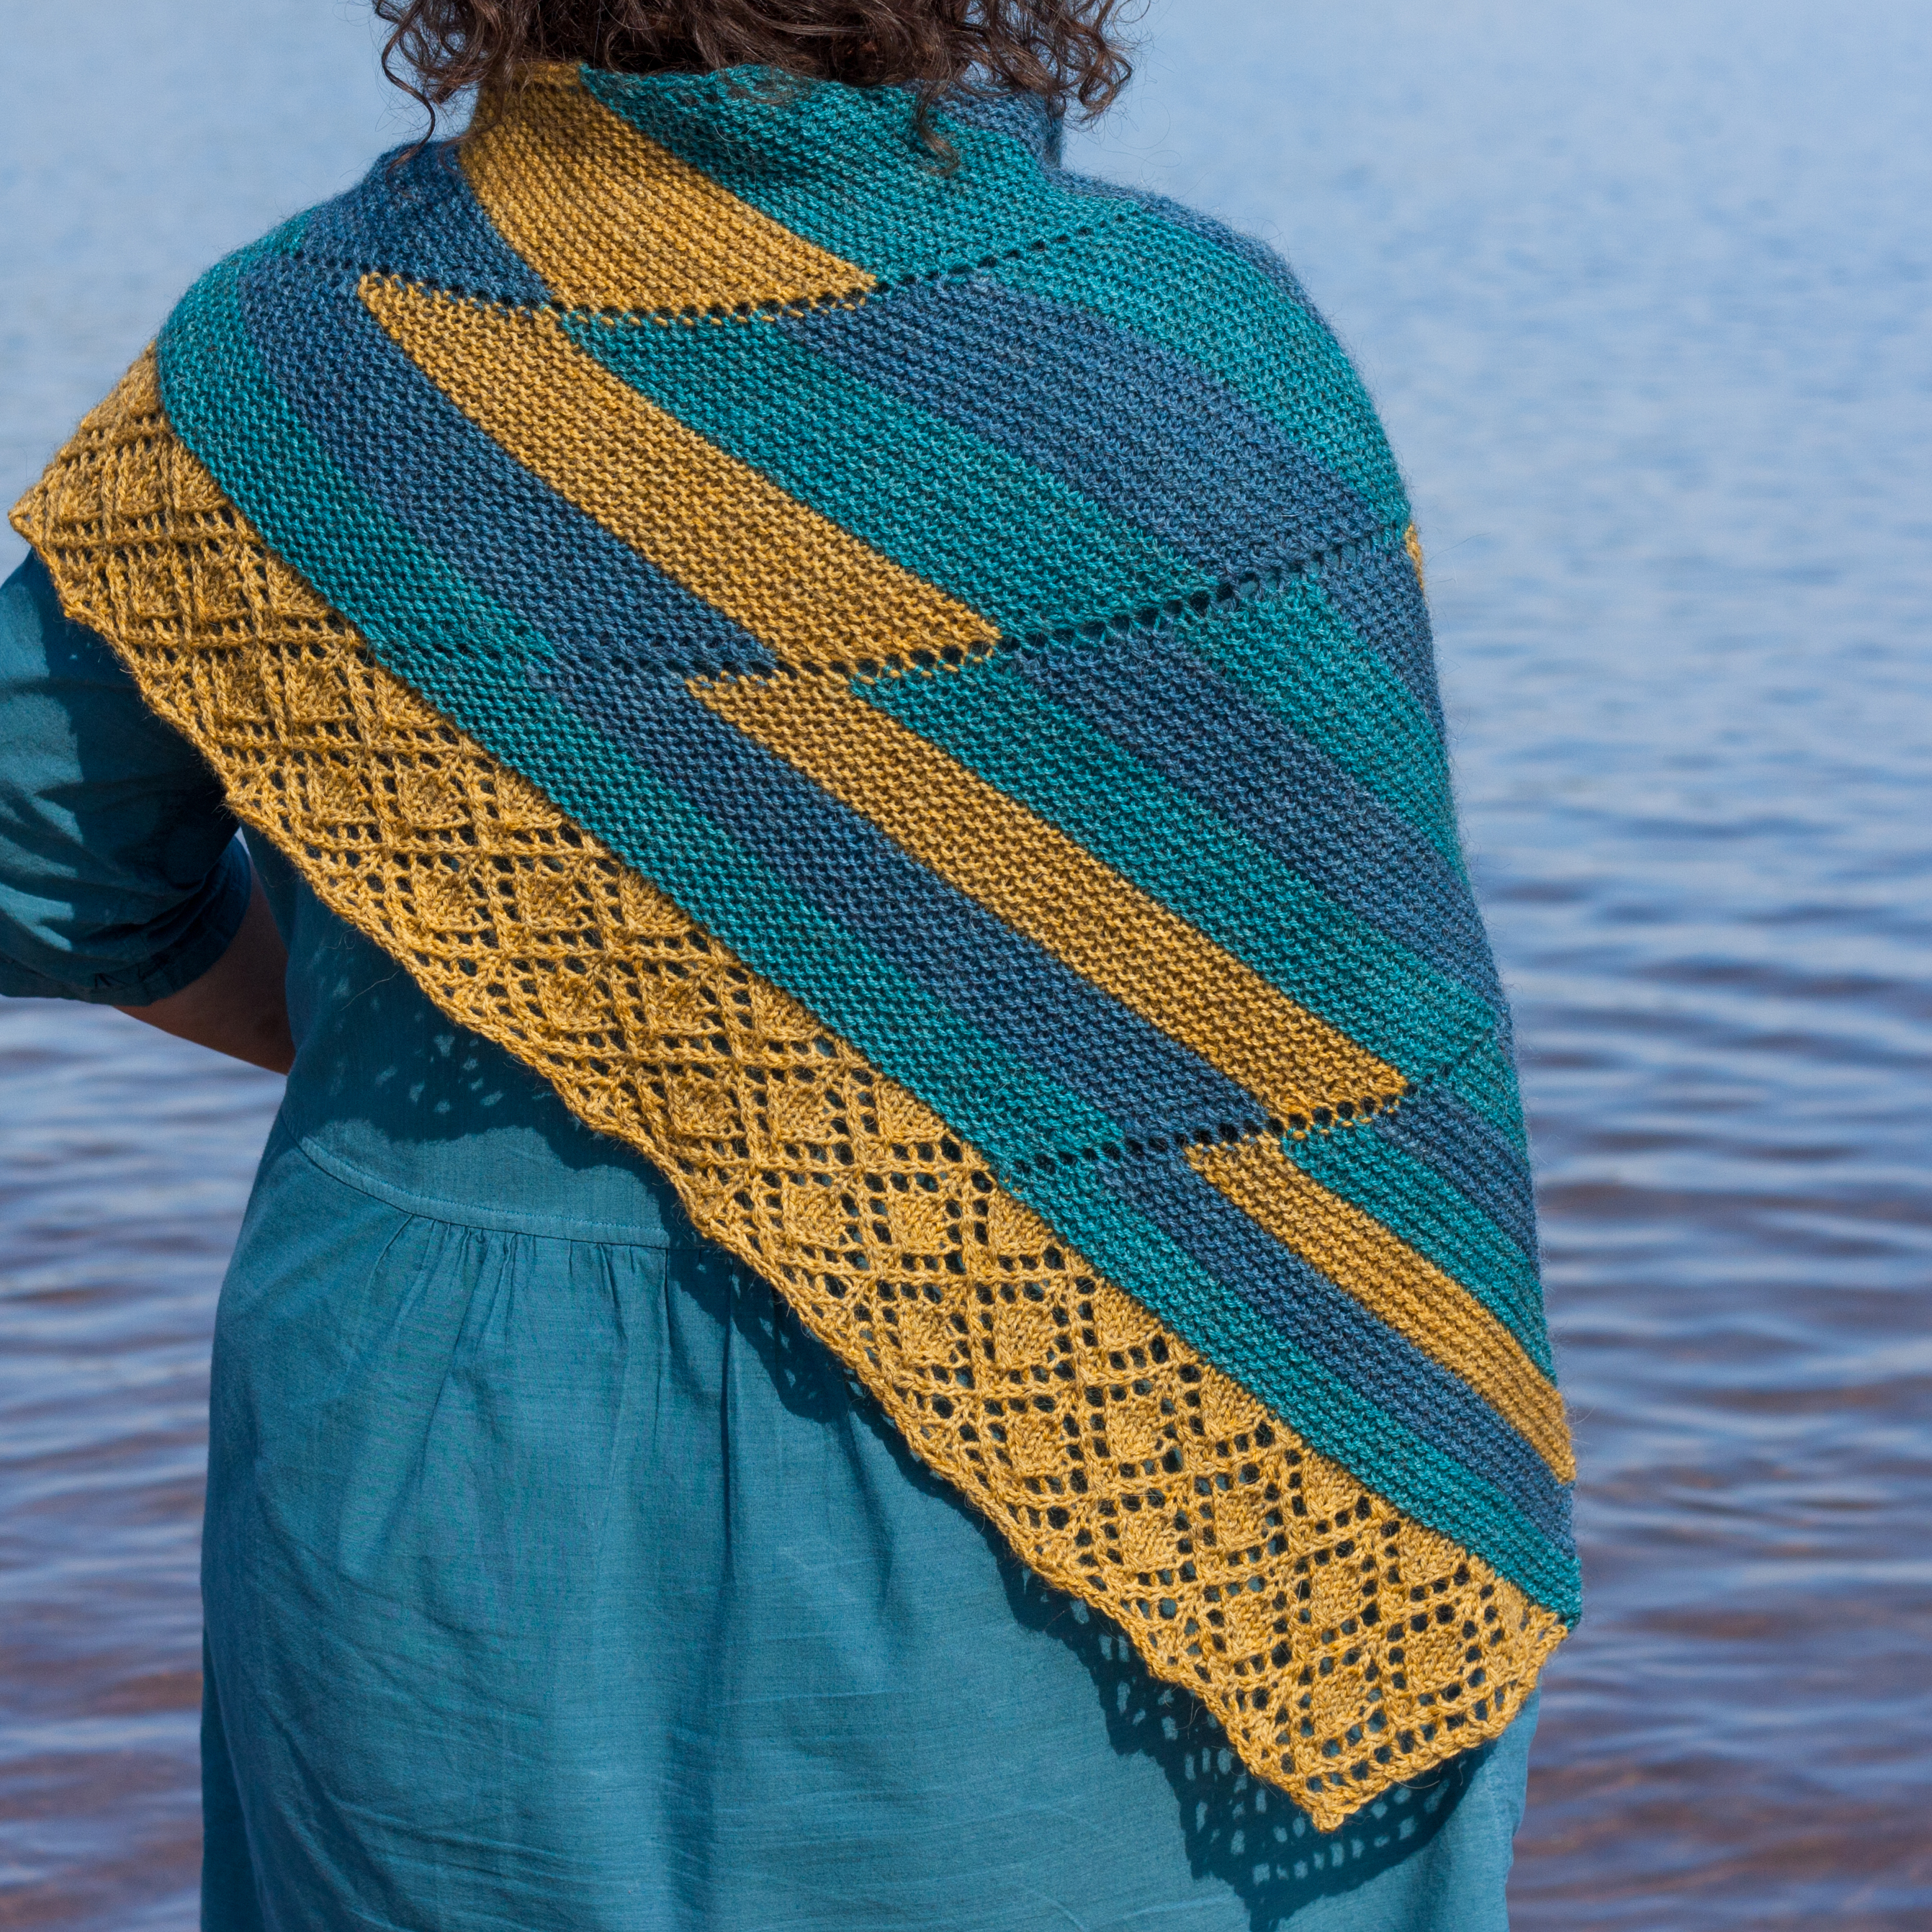
In the Stitchill Shawl, the strips are joined with a row of yarn-overs. The yarn-overs are worked at the start of a wrong side row in the first strip, and then picked up while working the second strip.
This gives a clean join between the strips, and gives the opportunity to play with different stripe widths across the shawl, without having to use intarsia.
Step 8: Managing your Design Business
posted on: July 1st, 2019
If you’ve gotten a single idea from concept through to publication, congratulations, you are a designer! That’s a great achievement. Now, if you want to do this regularly, there are some things to consider. How do you manage multiple projects, keeping track of deadlines etc? How do you fit in the needed marketing and other work? What about accounting and customer support? And what’s your long-term game plan? Lots to think about.
The whole series:
The preamble: So you wanna be a designer…
Step 1: From idea to pitch
Step 2: Charting and Ravelry
Step 3: Planning, grading and starting the sample
Step 4: Style sheet and layout
Step 5: Tech editing and testing
Step 6: Photography and Editing
Step 7: Pattern release and Marketing
Step 8: Managing your Design Business
Get Yourself Organised
PROJECT MANAGEMENT
Having worked through the previous 7 steps, you already know how much is involved in creating and publishing a single design. Especially at release time, I find it necessary to have a detailed task list to reassure me that I’m not forgetting anything. And if I have more than one project in the works, I definitely need a system to help me keep track of where everything is at.
But of course what works for me might not work for you. In fact, the two PiF partners work very differently. Robynn is a big fan of Trello (so many ticky boxes!) and the occasional spreadsheet calendar. Emily likes to keep it simple with paper lists. We’re not going to tell you how to handle this part, just that it’s worth spending some time thinking about what you want to manage, and maybe checking out what other designers recommend.
TIME MANAGEMENT
Designing clearly involves a lot more than just designing. Besides planning, grading, knitting, pattern writing etc you need to spend time on building relationships (with yarn suppliers, pattern retailers and/or magazines), promoting your work, customer support… how are you handling all of this?
Again, this isn’t something we can answer for you. All we can do is prompt you to consider some key questions as you figure things out.
– How does design fit into your life? Is it just a hobby or do you plan for it to form part of your income stream? If the latter, you need to treat it as a serious business and budget time for admin, customer support, marketing and so on. Maybe allocate 20% of your design hours to this kind of supplementary work. What that looks like exactly (what work you prioritise and how you pursue it) will depend on your answers to further questions.
– What’s your strategy? Go back to the preamble, thinking about what you want to get out of designing, and see the “game plan” section below. Are you excited to put the work in to build your brand and establish yourself as an indie designer? Would focusing on third-party submissions fit better alongside your other responsibilities?
– What can you streamline? Answering customer queries can become a major burden on your time, but it can’t be neglected. Think about how you want people to contact you (eg. by email rather than on social media), and how you can communicate that to them (eg. by a note on your patterns, your Instagram profile etc). If the same questions come up repeatedly, look for ways to answer them efficiently: maybe a form email can help, or a FAQ page on your website.
– Is outsourcing an option? Some designers hire virtual assistants to help with managing their Ravelry listings, customer service, accounting and so on. What can you simplify?
GOAL SETTING
However you see your design work – hobby or business – it’s worth putting some thought into what your goals are. Since it demands a lot of work (and often expense), you need to have a sense of what makes it worthwhile for you. That might be a specific cash figure, or (if you’re more hobby oriented) it could be seeing finished projects pop up on Ravelry and social media. It might even be a sideline that supports other work for you; for instance, if you’re a dyer who writes patterns to promote yarn sales. In each of these cases, even if you think “I just want the satisfaction of it!”, there’s likely to be a specific, measurable outcome that you’re hoping for. If you’re not getting that outcome, designing will stop being fun, so pay attention to what your goals are, whether you’re on track to reach them, and if not, what you can do about it.
There’s one other aspect beyond numbers. Creative people often have a strong emotional connection to their work, and the way it is received can feel very personal. This is maybe even more true with social media (which is such a key part of promoting your work). It feels great when people love what you’ve made! But if you’re not getting social traction, that can really hurt. All the known psychological risks of social media are intensified when it’s also your work on show. So pay attention to how you feel while using social, set boundaries, and protect yourself. (Too vague to be helpful? Sorry! This is a huge topic, and while it’s important to mention, we can’t possibly cover it properly in this post.)
Tracking your achievements is of course essential, so that you can measure progress against your goals. I suggest tracking monthly sales figures for each pattern, as well as total sales, Instagram followers and newsletter subscribers (or followers on whatever platforms you prefer). Don’t get bogged down in detail, but do check in maybe once a quarter to see what’s working – or not.
WHAT’S YOUR GAME PLAN?
In Step 1, we touched on the respective advantages of self-publishing vs designing for third parties (magazines, yarn companies etc), and mentioned other strategies such as partnering with dyers for kits. I encourage you to occasionally try something new. Keep an eye out for submission calls in the Ravelry Designers group; look for yarn support programmes from dyers you’d love to work with. These calls might provide unexpected inspiration, or a deal that works really well for you.
In building your self-published portfolio, weigh up new ideas in terms of how they fit into your body of work. If one of your patterns catches someone’s eye, they will often visit your Ravelry store to see what else you’ve done, so ideally you’ll have something else with similar appeal. Of course you don’t have to keep doing the same thing! But successful designers often have a recognisable selling point or aesthetic. You might specialise in fair isle or lace; baby knits, or quick accessories, or yoked sweaters. I’ve heard friends say that nobody cares if they put out a shawl, but their sweaters are loved, and vice versa. Robynn seems to do best with complicated brioche or lace designs, while stranded colourwork is Emily’s signature style. Doesn’t stop us from branching out, but it’s good to know what our respective customer bases particularly like to see from us. If you want to do something quite different, that might be a good thing to pitch to a magazine.
For self-publishing, steady effort pays off. Designers often report that sales enjoy a noticeable boost when they get to around 20 patterns. This makes sense! Each one of those 20 could sell at any time; customers visiting your page have that many more options to entice them; previous customers will take an interest in your new releases; and don’t underestimate the degree to which your designs and pattern writing will improve with practice. The most reliable way to get sales is to publish patterns regularly. But even if you only publish occasionally, the bigger your portfolio, the bigger your results.
DON’T TAKE ON TOO MUCH!
Finally, a word of warning. It’s easy to fall into the trap of feeling you need to chase every single opportunity that comes up – and to underestimate just how much work is involved. Be careful! You don’t want to burn out and stop enjoying the process. And you really don’t want to damage relationships by failing to make good on your commitments. Most people in this business are pretty understanding about designs hitting unexpected obstacles, taking longer than expected or needing to be rethought. But it is a business. They will hesitate to work with someone they’ve already found to be unreliable. So: limit your commitments. And stay in touch with yarnies or editors if an agreed-on project is throwing up problems. Good communication makes it all manageable (and you’ll feel so much better knowing you have their support).
Resources
Getting your first design out is a huge step. Building your design business from there is even harder! Getting support from other designers, and advice on the many facets of this gig, can be super helpful. So our main recommendation for resources for the long haul is: find your people.
– Again, we strongly recommend the Designers and Budding Designers groups on Ravelry. Ask your questions and read the archives!
– Francoise Danoy (going by Aroha Knits or Frenchie) runs a comprehensive coaching programme for aspiring designers, covering the business aspect as well as design.
Tara Swiger offers guidance (through her podcast, books, courses) on marketing and building a creative business. Not design-specific but very yarn-relevant, and often recommended by designers.
– Tian Connaughton also provides designer-specific marketing and business advice.
But here’s another warning: watch out for sharks. There are a lot – a LOT – of people out there offering help to creatives, and charging for it; some are known fraudsters. Some will promise to help you turn your hobby into a six-figure business, which is very far from achievable for most designers, and that should raise some questions in your mind. Our recommendations above are not based on our own experience, but they have solid reputations. If you’re curious about an offering, ask around (again, Ravelry is good for this); don’t trust testimonials published on the seller’s own website. Sign up for their free newsletters or whatever to get a taste of their style. There is some great stuff out there that might really help you! Or you might prefer a buddy system; private chats with someone else figuring out the same challenges as you can be very helpful. Lots of options.
How to steek an armhole
posted on: July 1st, 2019
So, there has been a fair bit of interest in a slightly longer edit of the steeking video I put up on Instagram the other day!
Steeking an armhole long from Emily williams on Vimeo.
This was filmed somewhat on a whim, but I will probably follow this up with a more detailed how to at some point, but I’ll have a knit a swatch to be able to do that.
My top tips:
– Use a crochet hook the same size, or slightly smaller, than your knitting needles for the project.
– Cut slowly and carefully!
– I like to use shetland lace weight for both the crochet and sewing down the steek. It will felt in nicely with the main fabric after it’s blocked, and reduces the bulk compared with using the project yarn.
– This is a 7 stitch steek (my preferred size) but they can be either smaller or larger
– This method is best used on a project that uses a good sticky yarn. If you are using something that won’t felt easily, such as super wash yarn, then you are best using a sewing machine to reinforce the steek.
Step 7: Pattern Release and Marketing
posted on: June 29th, 2019
Creating a pattern is hard enough – but getting people to see it, even buy it, is a whole job in itself. Marketing is a very broad topic but we’ll cover the basics and give you some things to think about, and work on, over time. Rachy Newin, who is a marketer in her day job as well as a well established crochet designer, contributed the bulk of the knowledge in this topic. Thanks Rachy!
The whole series:
The preamble: So you wanna be a designer…
Step 1: From idea to pitch
Step 2: Charting and Ravelry
Step 3: Planning, grading and starting the sample
Step 4: Style sheet and layout
Step 5: Tech editing and testing
Step 6: Photography and Editing
Step 7: Pattern release and Marketing
Step 8: Managing your Design Business
What Exactly is Marketing
A lot of creative people feel icky about marketing (we tend not to be big self-promoters) but I like the idea that “marketing is just being considerate”. If you have faith that your design is worth making, that it has value, then it’s considerate to let people know about it – the right people, that is; and of course letting them know isn’t the same thing as pushing it upon them. Nobody likes a spammer. But it’s fair to assume that your potential customers are downright eager to find out what you have to offer, because after all, don’t you get excited about seeing a gorgeous new pattern?
Marketing covers everything from how you get your pattern out there (sales platform, distribution, pricing etc) to advertising. I (Robynn) like to remind myself that I have three jobs as a designer: make the thing, sell the thing, promote the thing. Each of those steps relies on the previous one/s, but they’re all important: no point in doing any one without the others. Marketing covers two of those three areas. It’s a lot.
How and Where to sell
First step, choose your distribution strategy.
Online sales platforms are key for most indie designers. Ravelry is of course the biggest by far, but Loveknitting, Makerist, PayHip and Etsy are also all worth considering. Each one has its own audience, and some designers even find that certain patterns do far better on one of those than on Ravelry.
Ravelry also has an LYS sales programme – meaning you can allow shops to sell pdfs of your patterns, and take a cut. This takes no effort beyond enabling the option in your Ravelry listing, but if you hope to get good results, it could be worth contacting shops you know and offering free copies for the shop owner to have a sample knit up.
Selling printed patterns through yarn shops or at shows is another option. This can be expensive, since it requires cash outlay up front, and you have little control over promotion. Worth considering in the long term but probably not a great option for starters.
Emily has found that working with a dyer to sell kits has been very effective for her. This works best if planned from the start (the design and yarns to be used have been worked out in advance, together with the yarn seller) but has great potential if you can build a strong working relationship with someone.
And for How Much?
Second step, determine your pricing strategy. Pricing is a very hot topic – knitting and crochet patterns tend to be underpriced, largely because of a history of yarn companies distributing them for free (or for very little). Setting the price is complicated because you have no way of knowing how many patterns you’ll sell, so cost-plus doesn’t work. The “right” price then becomes what the market will bear. Lower prices don’t necessarily increase sales (some people report the opposite) but overly steep prices will almost certainly put people off.
A typical structure is to set prices at different levels depending on the complexity of the pattern – that doesn’t necessarily mean how hard it is to knit, but how much work has gone into creating it. Beginner patterns can be the hardest to write.
And then the thorny questions of promotional pricing arises. Many designers (including Robynn) offer launch discounts, which are an effective way to get eyeballs on your pattern – since you can list the pattern in promotional threads on Ravelry – and to give people a reason to buy, rather than faveing for later. But does that undervalue patterns? Do discounts lead customers to believe the “true” value of the pattern is less than the listed price? Be very careful with offering regular sales. You don’t want people to think they’ll just wait until the next special deal.
How can you make the pattern Irresistible?
For a lot of customers, their first encounter with your design may be viewing it on Ravelry. So make sure that listing is as convincing as it can be. What sells a pattern?
Pretty pictures! This is one of the biggest things so get a range of quality shots. Bear in mind that different photos will do well on different platforms, so keep an eye out for that. Unique photos also help with branding so people know it’s your pattern.
Descriptive text – that little blurb (also known as “pattern romance”) is pretty important. Good copy here tells a story (it doesn’t have to be fanciful, but it should convey some emotion), as well as conveying enough practical info that people know what they’re getting into.
Completed projects on Ravelry really help to convince buyers that the pattern will give good results – testers are a huge help for that.
When you’ve created your pattern listing, take a good look at the preview, compare it to pages from designers you admire and see if there’s anything you can do to make it extra compelling.
And then comes Promotion
People often think of promotion as the hard sell – here’s my pattern! Here’s why you should buy it! But if that’s all you do, you won’t get very far. Your potential customers want to know what you’re doing and they’re ready to be won over, but they don’t want to be aggressively advertised at. Your primary job is to build a following, not to be a virtual sandwich board. It’s not just about getting a one-time sale, it’s about building a community that will regularly support you.
And the good news is, marketing this way is a lot more fun.
Be yourself – but be your best self
For an indie brand especially, people want to connect with the person behind the brand. It’s very helpful to share little bits of yourself through social media –- outside interests besides yarn, everyday events, fun things like birthdays. Be careful with the balance, though. Showing your human side is good; allowing your pets, kids etc to dominate your feed is not.
And critically, remember you need to be your professional, best self. Vindictive pettiness, rants about the neighbours, overly personal details –- keep those to your personal profile.
You are not for everyone
Some people won’t like your style or won’t agree with your stance, and that’s okay. Instead of trying to please everyone, niche down and focus on the core audience that loves you and your aesthetic.
Similarly, don’t try to cover every social media channel. Focus first on the channels you enjoy – it’ll be less of a struggle, you’ll see growth faster, and it’ll generally be more rewarding. But bear in mind that growth is almost always slow and very few people go viral overnight. Give it time for people to find you and to grow your audience. Compare your stats and your growth to where you were a week/month/year ago, rather than to big names who are uber popular.
Focus on the long term
It’s very tempting to focus on the numbers that look and feel good (aka vanity metrics) but indie businesses often fall into the trap of focusing on those numbers instead of the bottom line. If you’re getting loads of followers, but it’s costing you money, reevaluate. At the same time, don’t get hung up on those metrics: a huge follower count doesn’t necessarily mean an engaged following. Think quality, not quantity.
Sometimes it’s important to invest a little bit of money into something that’ll result in sales in the long term. Indie businesses are often strapped for cash, so they’ll put in hours to avoid paying a nominal fee. Value your time, putting in ten hours to save $5 is paying yourself $0.50/hr – you’re worth more than that.
So, What does Marketing mean to You?
The bulk of marketing happens before the release (jab, jab, right hook). As discussed, this means getting your name out there and, building an audience, as well as getting people excited about what you have coming up. You don’t have to be on every platform, but put real effort into whatever platform you’re on –- be authentic and real and connect with humans (social media is all about social). The majority of your posts shouldn’t have a hard sell in them.
Pre-release
Release weekends tend to be busy and focused on selling, so use the time between releases to grow your audience and connect with new people. For instance, on the various channels (not all of which you’ll be using), this might look like:
Blog – posts about WIPs, upcoming projects, etc
Instagram – WIPs, yarn, snapshots of your life
Twitter – general interest, sharing yarn or designs that have caught your eye
Ravelry – participating in group discussions and possibly KALs or other events
Facebook – sharing WIPs and yarn-related updates
Pinterest – your back catalogue and other people’s content
Remember to engage with people, commenting on their posts and participating fully in whichever platform/s you’re on. This part is huge!
Sharing sneak peeks of your designs in progress is a particularly important way to build interest before the pattern’s even out, especially on Instagram. Be sure to let your followers know how to find out when the pattern’s released: punt your newsletter, your Ravelry group or of course your Insta. If you have a special launch discount for followers, mention that and make it clear how to get the best deal.
Pattern Launch
Once the pattern’s up and posted, it’s time for the hard sell. Let your audience know that you’ve got a new design out and why it’s awesome. This might look like:
Sending out a newsletter
Creating a blog post about it
A series of posts on IG
A couple of posts on FB page
Talking about it in your Facebook group
Pinning it to relevant boards, especially group boards
And then, spread the news outside your audience.
Share to Ravelry “new design” thread(s) in relevant groups – but bear in mind the spam rules, which prohibit posting the same message (even if not word-for-word) in more than two groups without permission. A lot of groups (including Designers and Budding Designers) have explicit rules allowing cross-posting in the announcement threads, but if in doubt, be sure to ask.
Similarly, share to popular Facebook groups, but keep an eye out for group rules.
Consider booking ads on Facebook or Instagram.
Ravelry ads are great value – especially the Group Forum Banners. These are easy to book (unlimited slots), cheap (pay per click) and highly targeted. The downside is, designing an eyecatching banner-style ad can be pretty hard. But it’s well worth the effort.
Resources
Google is your best friend. Social media changes quickly and there’s no one tip that’s guaranteed to be effective forever and always. If you’re trying to work on something, google it and look for a recent article from a reputable source. It’s also the best way to find out about something new – just heard of sales funnels? Pop the term into your favorite search engine to figure out what it’s about.
Ravelry’s wiki has detailed guides to help you get set up as a designer and advertiser.
And as ever, don’t forget the wealth of support and advice available in Designers and Budding Designers. A lot of marketing and social media topics have already been discussed in detail. This recent thread on newsletters is worth checking out.
Later is arguably the best of the social media schedulers (Buffer, Hootsuite and Tailwind are other options), in terms of functionality and ease of use. Their newsletter and blog are also worth checking out for social media tips, especially Instagram.
Canva is a useful option for creating ad graphics, although you’re limited to their fonts. Their marketing and design tutorials are also worth a browse.
Exercise
Create a social media plan, focusing on 1-3 channels. What platforms will you use? What kind of content will you share on each, and how often?
Create a release plan for your pattern. Draft 3-10 posts for each channel, with associated images. Remember to let people know about your launch discount (if offering one) and how to stay informed of the launch.
Open a Ravelry Pro store and create a draft pattern.
Create your promotion/s, if any.
Optionally, book an ad (or ads) and create graphics.
Next post:
Step 8. Project & business management, final questions
Step 6: Photography and Editing
posted on: June 26th, 2019
Getting photos of your finished designs is one of the bits of the design process that people find the hardest, and is well known to cause epic bouts of procrastination. There are many, many different approaches, and you will need to find something that works for you and the resources that you have available. To make it clear, we are not professional photographers, but this post outlines our approach and some hints and tips we have picked up on the way.
Photos don’t have to be perfect to make you look professional – if they’re well-lit (enough) and in focus (enough), it’s okay if they’re not technically perfect.
The whole series:
The preamble: So you wanna be a designer…
Step 1: From idea to pitch
Step 2: Charting and Ravelry
Step 3: Planning, grading and starting the sample
Step 4: Style sheet and layout
Step 5: Tech editing and testing
Step 6: Photography and Editing
Step 7: Pattern release and Marketing
Step 8: Managing your Design Business
Planning a shoot
Here are some of the questions to consider as you are planning the shoot.
Who is going to model? Doing the modelling yourself has some benefits (all the knits fit you, and it creates a strong identity for you as a designer and your patterns) and limitations (oh, the torture of looking at the photos, plus it’s much harder to take them!). Otherwise you can either hire a model, or use a friend or family member. Of course, you don’t have to use a model; many designs can be well displayed on a mannequin, for instance. But it will limit some opportunities on where you can be featured (KnitPicks comes to mind). Some designers also report that shots with actual people in them get a better response.
Who is going to take the photographs? Assuming that you are going to do the modelling yourself, the cheapest approach is to use a friend or family member behind the camera. I (Emily) have an ongoing skill swap with a local yarnie friend, Julie, but have also lived through the uncomfortable experience of having my husband (who is not particularly interested in either photography or knitwear) take my photos. I found it impossible to relax with him, and we usually ended up arguing. It is also possible to take photos yourself using a remote timer and a tripod, but it’s an added level of complication. If you have some cash to invest, you could investigate sending your finished object away for a shoot or hiring a local photographer.
Think about styling. I shamelessly plan all my sewing projects and clothing purchases around whether they will be a good background for modelling knitwear. I have two plain mid to dark grey dresses that are excellent workhorses for this purpose. It is also recommended that you take a few quick snaps of the FO in the planned outfit and convert to black and white – I’ve found that decent colour value contrast between the knitting and the background makes it stand out really nicely. A warning though, don’t use other knit items in your styling – it creates confusion as to what’s actually included in the pattern. Also consider if you are going to use any accessories or props (e.g. a mug to hold while modelling mittens), and try these out together with your design. Robynn has found that putting a bit of extra effort into outfit styling (grab a hat!) results in attention-grabbing shots and better sales. Playing with props or accessories can also give you or your model something to do while posing, helping you to relax and creating interesting photos.
Plan your location. All my (Emily’s) photos are done within a short drive of the house, but I’m super lucky that I have amazing scenery nearby and can get to hills, forests and lochs within a 10-minute drive. But you only need a little corner to take a good photo – it just needs to not detract from the knitting. It’s good practice to snap photos of potential locations as you notice them when you are out and about. Pay attention to the background! Dirt and mess will turn people off, even if it’s unrelated to the shoot. Unless you have fabulous scenery, try to pose somewhere not distracting and use depth of focus to strongly highlight the actual model/item, blurring out everything else. Shooting indoors needs extra attention to lighting so unless you are lucky enough to have ample, diffuse natural light, great equipment or great skills, outdoors is usually the best option.
On the shoot
Timing. Try to make life as easy for yourself as possible. If you can, avoid direct hard midday sunlight: this tends to blow out highlights and cast strong shadows, making it really hard to show the details. Taking photos on a lightly overcast day (or positioning yourself in light shade) will give a naturally diffused light, or shooting nearer to dawn or dusk (the famous “golden hour”) will make it much easier to show off your work.

A word on cameras. I (Emily) use a basic Canon SLR camera (bought second-hand 5 years ago for £100) and a 50mm fixed lens (£50). The only other specific kit that I use is a reflector and stand (about £50 for the two). Although it was not a big investment, the camera is a big advantage as it enables me to take RAW photos, meaning the editing possibilities are much better. The fixed lens has a really wide aperture so it is capable of controlling the depth of field. But you can get good results with cheaper kit; phone cameras are so much better than they used to be! I really recommend the Adobe Lightroom App as it takes RAW photos, and allows manual focussing on my phone (though some of the features are only available to subscription holders). If you need to control the depth of field to blur the background with a phone or automatic camera, try the portrait mode.
Have a list of shots. For modelled photos, take time and lots and lots of shots. Start with the easy ones (details, back view) and work up to the front facing ones as you get more comfortable. You will want to take some close-ups, and some that show the whole garment. Think about full frontal, side view, back view, detail shots (which details?) etc. And since your photographer might not be a knitter, remind them what matters to knitters. No point in getting a really pretty portrait where you can’t see the actual garment. You’ll want to get a couple of hero shots for social media and the pattern listing’s top photo, but think about what people want to know before they make a project, and make sure to include a photo that shows it: interesting seams, approximate size and fit, the shape of a shawl, etc. Is it a pullover or a cardigan? If you do have a good background (either beautiful or neutral), it’s worth getting a few wide shots as these can be cropped in many ways. Think of an ad, for instance, where you may want to place text without overlapping the actual item.
Check how it’s going. Stop often throughout the shoot to look at the photos. If possible, take your laptop and download the pictures before you come home. Seeing them on the bigger screen makes all those annoying details pop straight out – hello pointy nipples, or flipped over button band, or label showing, rubbish in the background or funny wrinkles. Play around with perspective. If you take one step forward, two steps back, three steps to the right, how does that impact the photo?
After the shoot
Editing programs. I (Emily) have a subscription to Lightroom/Photoshop, which is a reasonably costly option. But they are brilliant and have improved the quality of my pictures massively, especially by doing the editing in RAW format. I also use the accompanying apps (Lightroom, various photoshop apps) on my phone a lot. Lower-cost alternatives are out there: if you have a Mac, the free editor that comes in Photos is ok. Robynn recommends Snapseed for Android and Affinity for affordable desktop editing; Woolly Wormhead is devoted to Darktable for a powerful free option (open-source, all OS). If possible use a program that offers non-destructive editing so that you can go back to the original at any time, otherwise work from a copy.
First pass. Delete all the pictures that are even slightly out of focus, or where the model looks half drunk or has their eyes shut or something silly. This is usually about 30% of the photos.
Second pass. Start to narrow down the choice further – refer back to that list of shots and start to select the best couple of each angle, until there are about 15-20 pictures left. I edit these and then ask someone else to make the final choices.

Editing. Don’t be afraid to experiment and play with your editing software. Curves is my best “if you only learn one tool” tip, and often brightening the mid tones in a picture can be pretty transformational. It can also be useful to play with the luminence/saturation of individual colours if possible. When editing, think of all the different purposes you need pics for: not just Ravelry and the actual pattern, but for ads, social media etc. Tight detail shots tend to look good on Instagram, elsewhere you might want some wide shots.
BE OBJECTIVE! It is really hard to be objective about photos of yourself, and put aside vanity and feelings about your body, so if you have trouble choosing then get someone else to do it. To choose your hero shot, you could imagine the little pattern square surrounded by a big screen of HRN patterns and think about what will stand out there… sometimes a detail shot will be more impactful than a full view (and invite clicks for a better look).
Try again? Don’t be afraid to decide that none of them worked (if you’ve had a second opinion on that – see objectivity above) and do it again!
Resources:
– A Year With My Camera is a great free course, run over weekly emails (and supported by an optional workbook to purchase). She walks you through every step of a photo, and she’s a lovely person who creates lovely online spaces.
– This thread is a great resource for getting expert second opinions on not just which photo to use, but when you might need to reshoot or fix the editing.
– Beginner’s guide to using a reflector
– Here’s a broader photo thread (tips etc as well as critique) in Budding Designers.
– This is a great, detailed tutorial on using Lightroom for exactly this context (modelled clothing shots).
Exercise:
– Plan your photoshoot. Think about who will be photographer, and who will be the model. Consider time and location. Research the shots you want. Have a look through Ravelry/instagram for ideas of what looks good for a hat/shawl/socks.
– Head off and get some pictures, and then come back and have a play with editing. Get a second or third opinion on the finished results.
– Choose your final shots. Make sure you have at least one for each of the following purposes: (1) inclusion in the actual pattern; (2) the pattern listing on Ravelry; (3) social media promotion; and (4) possible ads.
Next posts:
Step 7. Pattern release & marketing
Step 8. Project & business management, final question
Step 5: Tech Editing and Testing
posted on: June 10th, 2019
Now your sample’s at least mostly done, the pattern is all written up and you’re excited to get it out into the world! But don’t rush now – it needs to be carefully checked first. Ideally in two separate, both very valuable processes.
The whole series:
The preamble: So you wanna be a designer…
Step 1: From idea to pitch
Step 2: Charting and Ravelry
Step 3: Planning, grading and starting the sample
Step 4: Style sheet and layout
Step 5: Tech editing and testing
Step 6: Photography and Editing
Step 7: Pattern release and Marketing
Step 8: Managing your Design Business
What exactly is tech editing?
Technical editing of a knitting pattern means carefully, methodically checking the pattern for errors, inconsistencies and areas of confusion. It should uncover any problems with the maths (do that many stitches at that gauge give the intended measurements? do the stitch and row counts work out after every bit of shaping?) as well as with more general logic (can you actually DO what is being described, and will it work the way it’s supposed to?). A TE should ensure that you’ve consistently applied your style sheet, that your instructions are clear and grammatical; they may also suggest alternative ways of writing or structuring the pattern, for the sake of clarity and conformity with industry standards.
Working with a TE is enormously helpful. Of course designers rely on them to catch our mistakes and protect our reputations – for that reason we very strongly encourage any designer to bite the bullet and hire one, even if you aren’t sure your pattern sales will recoup the cost. (More on that later.) You may be a very careful and accurate worker, but people don’t spot their own mistakes; that’s just the nature of the human brain. That’s why on newspapers, for instance, every text gets passed through at least three rounds of editing and proofreading – even editors themselves need their work checked. Your reputation as a newbie is extremely vulnerable; don’t give customers any reason to avoid your patterns in future.
But the other aspect is that working with an experienced TE can be a great education in pattern writing. They have the knowledge of how to express things; they also often have the right kind of mind to tease apart tricky areas and simplify them. This doesn’t just make your pattern infinitely better, it makes your life easier in terms of future pattern writing, and possible customer support time saved. (Ask Emily about how hard it’s been to teach me, Robynn, to reach out to her as my TE for advice on problem areas early in the process. And ask me about how incredibly useful her advice has been when I finally do reach out!)
It can take a while to find the right TE for you. As with any working relationship, it has to be the right fit. You may want a heavier or lighter touch (it’s a good idea to be clear on that from the start, if possible); you may just struggle to communicate. It’s fine to try out different people for your first few patterns.
But isn’t it expensive?
Bluntly, it can be. Since editors charge by the hour, the more work your pattern needs in the first place, the more you’ll have to pay. Rates vary (we’ve seen a range of around $25-45/hr), but remember that more experienced (and expensive) editors may take less time and ultimately cost less. Some new TEs offer low rates or even work for free/barter in an effort to build a client base. Nothing wrong with that, and it’s obviously appealing when as a newbie yourself, you can’t guarantee selling enough patterns to cover the cost. (Robynn has quite a few early patterns that never did earn out. They needed a lot of work and just weren’t that good!) But consider whether you’re missing out on the education aspect of working with a seasoned expert – it might be worth paying more and treating that as an investment in your own training. There’s no right way, just the way that makes sense to you.
To help keep costs down, it’s worth putting in some extra time to check your own work before you hand it over for editing. Accept that you won’t get it to a perfect state, but you can certainly weed out some errors.
– Compare the pattern to your style sheet, checking each point separately. Have you included stitch counts after each shaping section, and have you given them in the same format each time? Have you been consistent in presenting metric and/or imperial information? Are your abbreviations consistently used, and are there any not included in the abbreviations table (or listed but not used in the pattern)? And so on.
– Create a spreadsheet and enter the cast-on numbers for each size. Then, row by row, enter the numbers for every single instruction as they appear, and check that the stitch counts work out.
– Use the numbers in this spreadsheet (not your original grading calculations) to check the final measurements and yarn quantities.
Making this effort (essentially tech editing your own work) will probably pay off in billed TE hours, and could also be a good exercise in recognizing the kind of mistakes you personally tend to make.
Resources:
– Budding Designers has TE listings; it’s not entirely up to date but worth looking at. Asking friends for recommendations is a better starting point, if that’s an option.
– Indy Pattern Designers’ Resources is an entire group dedicated to collecting service providers – TE and other. Also a good place for tech editing discussion, although it’s not a super active group.
– Allison O’Mahony publishes an extremely useful and interesting newsletter for designers, offering a tech editor’s perspective – she’s taking a maternity break right now but you can browse the archives.
– Katherine Vaughn has a post on the typical time needed to edit different kinds of items. Allison, above, offers similar guidelines.
And what about test knitters?
Test knitters are brilliant but, we can’t stress this enough, not a replacement for tech editors. That’s for at least two reasons. First, they’re not trained professionals. (TE qualifications vary considerably and are usually informal, it’s true, but there’s still a level of specific skill that testers don’t have.) Second, it’s completely unfair to expect testers, at the usual level of tester compensation (typically no cash fee), to identify errors, never mind to suggest fixes.
What they can do for you is give feedback on their experience of actually knitting the pattern. Sometimes things look fine on paper but become confusing in practice. Sometimes people just have different preferences (and while you don’t have to accommodate them, it’s good to know). Sometimes yardage used varies more than expected. And of course, it’s really helpful to have real-world examples of the design worked up in different sizes and worn on real bodies.
Which leads to the second great benefit of using testers – having linked projects on Ravelry. Customers often want to see the pattern worked up in different sizes, versions or yarns, or – and this applies especially to new designers, without established reputations – just to see that it has been knit successfully by people other than the designer. It’s a huge marketing advantage.
Expectations
There’s some controversy around the question of fair compensation. Emily doesn’t use testers at all, because women’s work should be properly paid for, but there’s no room in her design budget for extra costs. Robynn is one of the designers who addresses this problem by running tests in a relaxed manner with low expectations, and rewarding testers with pattern vouchers.
The “relaxed expectations” model (sometimes described as an early-access knitalong) is pretty common and relies on shared understanding of what the test is about: it should be a fun process, with benefits on both sides. Typically, testers join in because, like any other customer, they simply like the design and want to make it. They may also be a fan of the designer and enjoy feeling that they are part of the creation process.
Unlike sample knitters (who are typically paid $0.15-0.20 per metre of yarn used, as well as of course having yarn supplied), they provide their own yarn, and of course keep the FO; they get to choose which size and version they make. There is usually a deadline (providing motivation and structure) but designers should be flexible and realistic: for testers, this isn’t a job, and life will sometimes get in the way.
We’ve seen some designers issuing a long list of requirements: testers must use the exact recommended yarn, they must comply with tight deadlines, must take high-quality photos and share them on social media… honestly, if those are the expectations, testers definitely should be paid. Don’t go there, unless you’re ready to pay sample knitter rates.
Where and how?
You have plenty of options – from Ravelry (in your own group, or a testing group), to Slack, email or Yarnpond (see below). You can also recruit testers via Instagram or Facebook.
In recruiting, be clear on your expectations and what you’re offering. Aim for a specific number of testers (ideally at least one per size or option); you may not get that many, but know what you want, and be ready to close the call when the limit is reached. I don’t recommend being too picky (again, they’re doing you a favour!) but it’s okay to gently say that they’re not a great fit if, for instance, they have no Ravelry projects posted. That said, don’t worry too much about people who plan to take the pattern and run. It happens, but not that often, and they wouldn’t have bought the pattern anyway.
Provide your testers with a list of questions to consider as they knit: for instance, is the layout clear and easy to navigate? Did the size and yarn usage work out as expected? Tell them how to stay in touch (do you expect regular updates?) and how to raise questions. I always ask them to post issues in the shared channel, whatever that is, rather than by private email, as it may well be relevant to others.
Make sure you’re very available for the duration of the test – any problems should be dealt with asap! A bit of cheerleading is also welcome as they post their updates.
And keep private notes on your testers. Anyone who has been particularly helpful (or shared really good photos) could be invited to join your mailing list for future tests. Anyone who has been difficult or flaked out without communication should probably be blacklisted.
Designers often ask whether it’s better to have your pattern edited or tested first. We strongly argue for editing first. Having your testers knit an incorrect pattern is disrespectful of their time (again, they are not being paid!), and possibly a waste of yours, since you want to know how customers will experience the final pattern. Also, remember that unlike editing, testing is optional. If you run out of time you can absolutely publish before testing is complete. Don’t ever publish an unedited pattern!
Resources:
– The Testing Pool is a very active group where you can recruit testers and run tests. There is a specific formula to follow in your post, but it’s not as rigid as the Free Pattern Testers group, which has very strict rules and no appeals process. (TTP tests are also usually unpaid.)
– Yarnpond is a platform for designers or publications to recruit and run tests. It’s free for testers; designers pay a flat fee of $5 per test. Personally I find Ravelry far more user-friendly, but Yarnpond is useful for reaching beyond your normal audience, and for running totally private tests for releases that must stay under wraps.
Exercise #5: Get your pattern revised
– Book a TE. Ask around or search the resources above. Email them to check availability, with details of your pattern (knit or crochet; type of item and level of complexity) and your timeline, if relevant. Also let them know that you’re a new designer and establish whether you’d prefer a light or heavy touch – for instance, would you appreciate feedback on your writing style, or do you just want actual errors to be flagged up? Check what document format they prefer to work in (Word is usually easier but you may prefer to send a pdf, in which case, how should they make their corrections and notes?).
– Do a final check before sending your pattern (see above). Email it along with clear photographs and your style sheet. Agree on a due date, and on turnaround time after they send their corrections.
– Recruit testers (if you’re using them). You can do this before editing is complete, but don’t actually start the test until editing is done (including post-editing revisions and possibly a final check) – let them know when you expect to have the pattern ready.
Next posts:
Step 6. Photography & editing
Step 7. Pattern release & marketing
Step 8. Project & business management, final questions
Step 4: Stylesheet and Layout
posted on: May 13th, 2019
Having completed the grading and thought through the logical construction flow, it’s time to convert those raw numbers into an actual pattern. Whether you’re writing it up before, during or (oh dear) after the actual knitting, one thing is for sure: you definitely want to write it from the start according to your style sheet.
Don’t have one? Well, this is where you start.
The whole series:
The preamble: So you wanna be a designer…
Step 1: From idea to pitch
Step 2: Charting and Ravelry
Step 3: Planning, grading and starting the sample
Step 4: Style sheet and layout
Step 5: Tech editing and testing
Step 6: Photography and Editing
Step 7: Pattern release and Marketing
Step 8: Managing your Design Business
Create a style sheet
Your style sheet is a live document, whose main purpose is to provide your pattern writing with consistency, and allow your editor to know how you mean to write a pattern. It will grow to include all sorts of information as you progress as pattern writers, and it is a brilliant place to store standard phrases and examples of things that you have already written for use again. It is also the place where you outline your style to your tech editor – do you want your patterns to be chatty and friendly and encouraging to a beginner, or do you prefer brevity, directness and concise instructions? Personally I (Emily) see repetition as a source of potential errors and inconsistency and I try to only put an instruction in once, rather than repeating it over and over again throughout the pattern.
But some things you really must be sure to include, and some things we recommend considering as you write your first pattern.
Name of the pattern – be sure to check Ravelry to see whether your brilliant idea has been used 30 times. It’s very hard (and not really necessary) to find a completely unique name, but you do want to be sure customers won’t be lost in a sea of similar sounding patterns. (Emily picks all hers from maps of the local area, which has the bonus of creating a very consistent naming “brand”.)
Introduction or romance text – a couple of sentences about the inspiration, construction and use of the pattern are important for selling the design. What makes it extra fun to knit, or great to wear? Does it solve a problem for the knitter? How is it constructed?
Yarn requirements – it’s important to provide clear information to allow for knitters to substitute yarn if they need to. As well as giving the information on the sample yarn, also give the exact yardage required for each size as well as an indication of what yarns would work as a substitute. (Not specific brands, but what qualities to look for, e.g. drape or stitch definition.)
Tension or gauge – give the exact row and stitch count per 4 in / 10 cm.
Size information – give as much information as possible, or refer to a full schematic. We also give information on what size is modelled and how much ease is shown.
Level of difficulty/skills required – this is entirely subjective, but I have a list of skills that I assume people will be able to use for each pattern.
Contact information for the designer – provide at least one way to get hold of you; you’ll probably also want to direct customers to your social media accounts, so you can hope to convert them into fans and future customers.
Dates, version number and copyright statement – always!
Pattern Directions
Here we get to the nitty gritty. Consistent punctuation and grammar throughout the pattern is really, really important as an
indicator of a well-edited, well-written pattern. Messy text will lead customers to assume, should they run into trouble at any point, that the problem lies with your pattern not their interpretation (leading directly to more customer support work for you). Consider your formatting carefully: are any parts going to be in bold or all in capitals? Are you going to write the instructions in sentence case with a full stop at the end? How and where are you going to include stitch counts? How are you going to delineate repeats within a row of instructions?
For example, here are a few ways that you could write the first row of a pattern in 2×2 ribbing:
Row 1: [K2, P2] to end. 24sts
Row 1: *K2, p2; rep from * to end of row. (24 stitches)
R1 – Work in k2, p2 ribbing across. (24 sts)
Row 1(RS): *K2, p2; repeat from * to end. 24 sts.
None of these are wrong; but your chosen format must be applied consistently throughout. At this point there is no need to cover every single eventuality – just enough for this pattern. You can add to and modify this document to include other techniques as you need them.
Some other points to consider:
Are you going to write the pattern in British (tension, stocking stitch etc) or US English (gauge, stockinette)?
How are you going to convert between cm and in? You can either calculate both sets of measurements directly from the stitch count and gauge, or calculate one set (metric or imperial) from gauge and then convert. This may sound like a finicky distinction but you’d be surprised at how different the results can be, owing to rounding. Arguably, calculating directly from gauge will give more accurate end results no matter which set of measurements are being followed.
Resources:
Kate Atherley’s Beginner’s Guide to Writing Knitting Patterns is exactly that and lays out everything that a style sheet needs to address – among very many other things.
Pattern layout
A polished, well-considered layout does a lot to make your patterns look professional (which again adds, consciously or not, to the trust a customer feels in your pattern). It also improves actual usability. Don’t stress too much over this – most designers aren’t layout professionals, and paying someone to do your layout adds a fair bit of unnecessary expense to your upfront costs. You don’t need to invest any cash at all, but spending a little time on creating a good template is well worth it.
Software
Word, OpenOffice or Pages for Mac will get the job done – they won’t allow for super-complicated page design, and Word in particular can be a real pain when it comes to multi-column layouts with tables and pictures, but it’s workable. If you want to try a more powerful layout tool, you don’t have to fork out for a monthly Adobe InDesign subscription (although if you do have access, it’s great!). Scribus is free open-source software that can do most of what Adobe does, it just has a slightly steeper learning curve. It’s even possible to create pattern layouts in Canva (free online tool), though I am not sure how user-friendly that would be. A new affordable option is Affinity Publisher – now in beta, it’s designed to be a fully featured, professional-level alternative to InDesign but at a much lower price point (expect to pay around $50 on release, or download the beta now for free). You’ll find masses of online tutorials to help you find your way around any of these packages.
More important than what tool to use is the raft of creative decisions you have to make – considering the practical implications of each aspect, not just the aesthetics. Don’t over-engineer it; minimalism is your friend. A super-fancy layout won’t make the pattern any easier to use, or really, any better looking.
Questions, questions!
– What font(s)? Font choice (and size) has a major impact on readability and of course the space used. You’d be surprised how quickly changing the font, even at the same point size, can change the final page count.
DON’T go overboard with fonts – either too many, or too fancy. You can indulge yourself with a fancy headline font but make sure the body text is easy to read (and then choose a headline font to complement it). Pay particular attention to crucial (for patterns) details such as a clear difference between 1 and l. I recommend trying out fonts with a short section of pattern text using various typographic elements, eg. “Sl1, *k3 [4, 5, 6], p2, repeat from * three times”. Don’t forget to check bold and italics, if you’ll be using those formats.
– Is your pattern going to be printed (either by users or for sale)? Assuming that you want customers to be able to print it easily (not everyone works from iPad), go easy on the photos and colours. A lot of people prefer to print in black and white, so try to avoid using colour coding for any crucial information. Avoid using patterned or coloured backgrounds. If you’re planning to wholesale printed patterns, keeping to a multiple of 4 pages is necessary for professional leaflets.
– One, two or three columns? Using newspaper-style columns saves a surprising amount of space, and arguably makes it easier to read (but preferences do vary, and columns are not suitable for users with low vision). Three columns can allow some great page designs if you’re using good software, but will be a pain in a word processor, and more than three is definitely too many.
– What will you put on the front page? Two popular approaches are to include all the key pattern information (photo, yarn requirements, sizing, needles, gauge etc), OR only the hero photo, pattern and designer name – this allows the customer the option of not printing it, to save ink on that big splashy photo, and looks great for retailed patterns.
– How will you place charts and written instructions? Will all charts go together (benefits: you can arrange them in the correct knitting order, as they will appear; customers who don’t use charts don’t have to print this page) or will each chart appear above the written instructions for that stitch pattern (benefit: easy cross-referencing in case of confusion)?
– Is there any supplementary information (such as tutorials or references) you can skim off into an appendix – maybe even a second pdf? Again, customers will appreciate not having to print (or accidentally printing) anything they don’t need.
– What about accessibility? Layout for screen readers or low vision has pretty much the opposite requirements of otherwise “good”, or at least efficient, layout: large fonts and no columns, for a start. You might create two different pdfs to suit different needs (I’m planning on working on this myself).
– Do you need a schematic? I don’t consider this always necessary (eg for a rectangular scarf, or standard socks, as long as all relevant measurements are included in the sizing section), but it’s often appreciated, and certainly needed for anything other than the most basic shapes. It is not compulsory to use software to draw your schematic – if you have the sketching skills then a neatly drawn picture is a beautiful thing.
Resources
Again, Kate’s book covers a lot of ground on layout and formatting, including input from customers on what they do or don’t like.
– Typography in 10 minutes is a nifty little thing but I do strongly recommend reading more of the book.
– These guidelines on combining fonts include pointers on creating hierarchy through styles.
– Wordmark.it is absolutely brilliant for testing your text (be it pattern copy or headings) in one step on all your installed fonts. Ultrazone does the same thing for all Google fonts (all of which are free for commercial use).
– Joeli’s Inkscape tutorial will guide you through making basic schematics, and Marnie has tuts for doing so in both Illustrator and (!) Word.
– Ravelry’s Accessible patterns group has tons of help on creating layouts that are friendly to screen readers and low-vision users.
EXERCISE #4: Create your pattern template and style sheet
– Read through the style sheets linked above. Save one as a document to use as the starting point for your own. (Also see our layout templates; Emily’s includes her full style sheet.)
– Consider how you want to handle each style point, and edit accordingly.
– Answer the questions above to define your layout template specifications.
– Choose your layout software (Word is fine) and format your style sheet as a full template, reflecting every element of your pattern.
– Create a full schematic, if needed, and place in the template. You can draw it by hand or use any software you like (Inkscape is free and powerful).
That’s a lot to be getting on with. The next step is to write your actual pattern and pop it into this layout; no small task, but between the previous exercise (grading) and this one, you should have all you need. So we’re not making it a topic in itself. But we will give you an extra two weeks to complete that, and the sample knitting – meaning the next topic will appear on Monday 10 June. Have fun!
Next posts:
Step 5. Photography & editing
Step 6. Tech editing & testing
Step 7. Pattern release & marketing
Step 8. Project & business management, final questions
Step 3: Planning and starting the sample
posted on: April 29th, 2019

You’ve refined your concept and charted the stitches: finally it’s time to start your actual sample. Of course once you have your yarn it is really tempting to just grab it and start knitting right away, but there are a few crucial steps to be done first.
The whole series:
The preamble: So you wanna be a designer…
Step 1: From idea to pitch
Step 2: Charting and Ravelry
Step 3: Planning, grading and starting the sample
Step 4: Style sheet and layout
Step 5: Tech editing and testing
Step 6: Photography and Editing
Step 7: Pattern release and Marketing
Step 8: Managing your Design Business
Gauge swatch in the sample yarn
We talked about swatching at the proposal stage, but there is one more to work. And that is a large (at least 15 cm / 6 in square) swatch using the yarn you have for the design. This should use the stitch pattern that you intend for the final project, should be knit flat/in the round as you intend to work the sample, and should be blocked appropriately. For lace, that would be a hard block, or for a garment a gentle pat into shape and then pinning before leaving to dry. Obviously this step is less important where the finished fit isn’t critical (eg a lace shawl), but it is still worth doing to check you are satisfied with the fabric created using your chosen needles.
It is really important to measure the gauge on your swatch both before and after blocking. If it changes substantially, then this is worth noting in the pattern, especially if instructions will include lines like “work till piece measures…”
Note down the pattern details
– Yarn: take a note of the yarn details, including colourways used. I often take a photo of all the ball bands for a complete record. Remember to weigh your yarn accurately (and note this down somewhere safe) before you start knitting the sample. This will mean you can weigh your leftovers and calculate exactly how much of each colour you have used.
– Needles: note down the size(s) you used for the gauge swatch and any others you will need for the pattern.
– Notions: keep track of the number of stitch markers you use, and also any other notions such as a cable needle, buttons, stitch holders etc.
You should take a lot of notes while knitting the sample – really, a lot of notes. You’ll think you don’t need it, but you do. So keep all of these details in a notebook right in your project bag and use it often.
Size charts and grading
There are many intricacies in the world of pattern grading, and everyone has come up with their own approach. We can only provide guidanced based on how we go about things. First off, decide on how many sizes to offer. Try to include at least a few sizes, even for things like hats, gloves and socks, because truly one size never does fit all. There are some patterns where this doesn’t work out, but it is always worth attempting.
Resources:
ASTM misses/plus size standards – these are the most comprehensive size charts available, but are pricey. If you are serious about designing garments they contain a wealth of information. However, the following free online resources are also very helpful.
Ysolda size chart – and drawn together by designer Ysolda Teague from a variety of sources. Usefully for knitwear design, these are sized in 5 cm / 2 in increments at the bust.
Woollywormhead for hats – fantastic range of hat depths and circumferences from newborn to large adult.
Knititnow for mittens – includes thumb dimensions, as well as length and circumferences for the hands and wrists.
Knitty for socks – results of a survey of nearly 400 knitters.
Emily: My sizing is based predominantly on the ASTM standards, with reference to Ysolda’s table where I need to. The one size chart that I absolutely don’t use if I can avoid it (some publications want designers to use them for all their designs) is the CYCA standards. I find that, especially for the armscye, the sizing is not accurate in the larger sizes and that there are several body dimensions that are important for design but which are not included.
Robynn: I have created very detailed sizing spreadsheets over time that synthesize measurements from a range of sources – including all of the above – into a table that makes sense to me. So I don’t have to look numbers up afresh each time, I just start with my huge spreadsheet and delete whichever numbers (sizes, body dimensions etc) are not relevant to that particular design.
The important thing to note with all these is that they give body sizes, and not finished garment sizes. It is up to you to determine the desired ease, i.e. how much larger the item should be compared with the wearer’s body. Sometimes negative ease – an item actually smaller than the body – is needed; for instance, hat brims always need to be a bit “too tight” for a good fit, and a close-fitting sweater will often have negative ease at the bust. Outerwear of course needs to be much roomier.
Using Excel to calculate finished sizes and stitch counts
There are a number of excellent resources for pattern grading available, but these are mostly aimed at grading garments. This is going to be over-complicated for accessories, but it will give you a good starting point.
The basis for calculations is as follows:
– Based on the size charts you are using, determined the body dimension (eg, head circumference).
– Add or subtract ease (e.g. for a hat, subtract 2.5 cm / 1 in from the head circumference) to calculate an approximate finished dimension.
– Multiply the finished dimension by gauge to get an approximate number of stitches.
– Round the number of stitches to fit in with your stitch pattern. Say your approximate stitch count for a hat is 124, but your lace pattern is a multiple of 6 sts, you would round up to 126.
Although you only need one stitch count for your sample, you will of course have to work out a range of sizes. So you may as well set up a spreadsheet (see resources below) to calculate every size right from the start. Doing this will also highlight any potential problems with the grading (maybe the stitch pattern just doesn’t work with one or two key sizes, for instance) and give you a chance to adapt your pattern at this early stage, if need be. So take care to think through the entire project, determine the key points at which shaping needs to be done, and plan for your whole pattern from the start.
As you get more experienced in pattern writing, it is likely that you can work towards being able to write the pattern in advance of casting on the sample. We still don’t always do this, especially if working on something totally new, but it is an excellent aim. As mentioned above, attempting full grading from the start gives you a chance to adjust the pattern to avoid pitfalls. Working from a fully written pattern also saves you time as you knit (no need to stop and calculate along the way), and to an extent you become your own test knitter, spotting possible problems in the instructions as you go.
It is worth noting that the grading spreadsheet is going to be different for every project, so need next to no calculations, some need lots. But the important bit is to use a consistent structure and to make sure that there are clear labels and notes throughout so that you can remember what you have done when you come to it later.
Resources:
Marnie Maclean Tutorials – Some excellent guidance, including example spreadsheets that include measurements and shaping formulae.
More are linked from the resources page in the Budding Designers group, but are mostly are aimed at grading garments.
There are also courses on Craftsy that cover the topic, though I found them hard to watch.
Then all that remains is to cast on your sample. Again, remember to TAKE ALL THE NOTES. It is the unwritten rule that you can never remember that thing that seemed so logical and obvious when you are knitting. Whether designing on the needles, or working from your drafted pattern, you need that notebook and pencil close at hand.
Exercise #3: Plan and grade your pattern
Create a full grading spreadsheet.
– Set it up in whatever way works for you, but ensure that you have somewhere to record: your gauge (both stitches and rows per inch), actual measurements and stitch counts for each size. (Note that Marnie’s tutorial includes a very handy tip on naming cells, which makes it easier to refer to gauge, but that doesn’t work in all spreadsheet applications.) .
– Create rows for each key measurement. Eg for a hat, this would be head circumference and hat depth (brim to crown).
– Enter the relevant formulae to calculate your starting stitch count.
– Think through the construction. What are the key turning points – when do you need to start, stop or change shaping? What’s the logical flow of the pattern?
– Create a new row for every relevant turning point in the pattern and calculate the stitch counts at each point. (For something like a top-down shawl, with regular increasing, the process is a bit different; rather than working backwards from the desired stitch count, work forwards to determine the stitch count that will result after completing X repeats or reaching a given length.)
– Develop your spreadsheet (including more rows as necessary to determine the spacing of increases or decreases, for example) until you are confident you have all the numbers needed to create your sample. Highlight or bold the column for your sample size. Print it out and keep it in your project bag, with a pencil, ready to take ALL THE NOTES.
– Start knitting! Wheee!
Next posts:
Step 4. Style sheet, pattern writing & layout
Step 5. Photography & editing
Step 6. Tech editing & testing
Step 7. Pattern release & marketing
Step 8. Project & business management, final questions
Step 2: Charting and Ravelry
posted on: April 15th, 2019
Charting
This is the second of the posts in our (Emily and Robynn) series for the Pay it Forward design school.
Previous posts:
The preamble – So you wanna be a designer…
Methods of drawing charts
There are several different resources for creating knitting charts, but the two main options for charting specific software are Envisioknit and Stitchmastery. I use Stitchmastery rather than Envisioknit because it is available for a Mac operating system, but in discussions on the Designers forum on Ravelry there are lots of people recommending either. Both programmes allow for drawing charts, customisation and, crucially for me, automatically generating instructions to accompany the charts. That said, the main source of my loyalty to StitchMastery is the excellent support available to users – there is a wonderfully informative blog and an active Ravelry group for any questions, and any time I’ve needed to email I have received a really quick an informative response (including things like, Help! I seem to have lost my activation key in a computer update).
If your main concern is to have full control over the appearance of a chart, or crucially if you want to draw a crochet chart, then using a graphics programme such as Illustrator or InDesign is your best option. There is obviously a steep learning curve involved, and you will need to either use a knitting specific font or create your own symbols for the different stitches, but this allows you full customisation over the appearance of your graphics.
To create charts using software that you already own, Excel (or Numbers) are also reasonable options, especially if you combine it with a knitting specific font for the various symbols (the one that I know of is available from Stitchmastery). To my mind the main drawback of both these options is that no written instructions are generated, and if you are making a large or complicated chart then creating those from scratch will take a significant amount of time.
There are also several free options for generating charts available on the internet, the most interesting of which is Stitchmaps. This allows you to see the shaping effect of the stitches you are using, as they are not constrained to a square grid – I often use it to check how things are going to line up after I have charted something in another programme, though I find the charts hard to knit from. Bear in mind that while you can draw a chart for free, a subscription is needed to export.
The final option is to pay a tech editor to generate the chart for you, which is probably not as expensive as you might imagine. However, to then have that chart checked it might be necessary to go to a second editor, as it is difficult to check your own work.
Resources:
Stitchmastery blog posts by Kate Atherley
Marnie Macleans tutorials (covering generating charts in Excel and Illustrator), including a tutorial for drawing crochet charts
More resources for other programmes.
Exercise #2: Charting your design using Stitchmastery
Create a full electronic chart for each stitch or colourwork pattern in your design (or if you don’t need a chart for your design, chose a pattern to chart and have a play!).
Make sure that the chart clearly shows the repeat (by stitches and rows) and that every increase and decrease is accounted for. Play with the appearance of the chart – you can change the font and the size of the text, maybe re-arrange the key.
Check the written directions – are there any changes you want to make? One of the really powerful features of stitchmastery is the ability to create your own stylesheet to customise how these instructions work.
Export both the chart and written instructions.
Join the Stitchmastery Ravelry Group and read through some of the conversations there.
If don’t have access to Stitchmastery use another one of the programmes listed above to generate a chart. Make sure that the chart clearly shows the repeat (by stitches and rows) and that every increase and decrease is accounted for. That is, do the stitch counts work out? Does each row consume the correct number of stitches resulting from the previous row? If the stitch count changes from row to row, is that clearly shown?
Write the pattern out in words and check the same thing – is every stitch accounted for? Write out any changes in stitch count at the end of each row. If you’ve done the wording manually, then if possible, enlist a friend to help you check the chart against the written instructions – read out each row of the chart to them while they follow the wording, to be sure they match up.
Ravelry for designers
Ravelry is an astonishingly rich resource and if you don’t use it, you are cutting yourself off from a wealth of knowledge, data and support. Now why would you do that?! Let’s take a whirlwind tour of the main features – with a designer’s perspective. Probably you know a lot of this already but since everyone uses Rav differently, I’m assuming nothing.
The social side

This is my (Robynn’s) Ravelry home page. It’s not the home page (what you’d see if you click on the icon, top left) – that would show you the Rav blog, and some helpful links for newbies; but I point my bookmark to the forums, and specifically to these groups, because these are the discussions I like to keep tabs on every time I check in. You might notice that none of them are the “Big 7” forums that every Raveller belongs to as default. Those are great, but I don’t need to watch them regularly (and honestly… because they’re so active, they can be pretty distracting). I belong to a large number of groups and I’ve arranged them in five different tabs, but these are the most important ones. Top left is the group I co-host with Emily, to discuss our designs. It’s not the most active, but it is friendly and most important, it’s a really useful space to announce new releases, run tests and so on. Then Designers and Budding Designers are the super-valuable groups we keep harping on about, and below I’ll show you some of the reasons why. The other groups you see there are useful for keeping an eye on new Rav developments and such, and below that (out of screenshot) I have some of my favourite social groups.
I could easily rabbit on for ages about the forums, but will try to focus on the key points. First: use the groups. There are groups for so many special interests – everything from Harry Potter to local knitting groups (or shops) to dyers and designers to parenting or feminism to particular styles of knitting… Finding a group you feel at home in can be a deeply wonderful experience, but as a designer, the main thing is to get to know groups that are relevant to your designs. For instance, groups for shawl lovers, or colourwork. Those groups can be a rich source of market research, not to mention sales. But here’s the second point: don’t be gross. As indie designers, we are incredibly lucky to have a community of customers who are genuinely eager to learn about our work, but nobody appreciates a hard sell – especially coming from someone who doesn’t participate in chat but just jumps in among a bunch of strangers to push their patterns. We’ll talk more about appropriate behaviour much later on, in the marketing topic, but basically, just remember to be considerate. Join groups to get to know what your customers want, and maybe to chat with them; promote your designs there using targeted ads, and (depending on the group’s rules) to announce new patterns in the appropriate thread. Don’t be pushy. But do take the time to find your audience.
And definitely take the time to get to know the two designers groups. Both are welcoming and supportive, full of detailed information and advice, but for a newbie, BD is definitely the better one to ask questions in. Spend some time browsing the archives (and resource pages) in both, though. You’ll learn a lot. One thing to bear in mind: both groups are home to plenty of non-designer lurkers – people who enjoy hearing about what designers do behind the scenes, without wanting to design themselves. This is great, because they occasionally pipe up to give a customer’s perspective (so helpful!), and because they follow the monthly New Designs threads. But remember they’re reading, and consider how you want to present yourself.
Note the two ringed links in the above screenshot – patterns, and “my designs”. Besides the groups, those are core features to understand.
The database
Ravelry’s complex, user-generated database of yarns, patterns and projects is enormously powerful and enormously valuable to anyone in the industry, because of the interconnections between those elements. As a casual user, you can search for project ideas by checking what others have made with the yarn in your stash; or what yarns have been used to make that pattern you’re eyeing up; or you can look at FOs for a particular design to see how it looks on a body closer to your own shape than the model’s. For designers, all of those uses are great, but you need to particularly understand the pattern database.
The advanced pattern search lets users filter by (many!) factors including yarn weight, yarn quantity, item category, fabric characteristics and a host of design elements, from construction (flat? seamless? top-down?) to neckline shape – so be sure to add all that detail when uploading your pattern. You can also use this search in the design planning stage: for instance, to get a rough idea of how much shawl a skein of a particular yarn might make. (Of course you need to swatch and weigh to know for sure, but this is a handy starting point.) Or to see if your brilliant idea has already been done ten times over. (But remember, originality is overrated.) And definitely to check if your perfect name turns up five pages of results…
The pattern database can also be viewed in order of recent popularity, or the (in)famous “Hot Right Now” pages. Visit this page with care: it can be demoralising, if you feel it’s being dominated by a particular aesthetic and a handful of top designers; and it’s easy to get sucked into checking where your newest release is on that list. (The flurry of activity that goes with a launch often pushes new patterns up the rankings for a day or two.) HRN isn’t necessarily a good indication of a pattern’s success in the long run. But it is interesting to view as a trend snapshot – and I find it helpful as inspiration for pattern styling.

Beyond that, you need to understand how your own patterns appear. I know that as a customer, I always check user projects (look along that row of tabs at the top) to see how the design looks in different yarns and on different bodies. So do what you can to boost those project numbers – test knitters are great for this. I also like to feature my favourite customer projects alongside my own photos (as I’ve done here), to highlight the pattern’s versatility, but many designers prefer to keep a tight rein on the page’s aesthetic by only using their own photos. There’s no one right way.
Your designer page

Every named designer of every pattern on Ravelry has a page like this – including those who only design for magazines or other publishers. Self-publishing designers also have Ravelry stores. The wiki has detailed guides on getting started as a designer, and setting up your store.
Your designer page of course lists all your patterns, but it has some other nifty features. First, you can create bundles to help customers navigate those patterns. Second (and far more important to you as a new designer), it gives you a place to let customers get to know you – what’s your design philosophy? Where else can they find you online? Don’t neglect this space. Nor, for that matter, your personal Ravelry profile. It’s easy to forget to update your social links etc, but what a wasted opportunity.
There’s also a link to user activity, which shows every like, every queue, every comment or forum post about any of your designs. I love being able to see who’s talking about my stuff this way, but again, you have to go carefully: there’s a fine line between thanking someone for mentioning your work, and butting in unwanted. I always check carefully to see why the pattern came up and might say something like, “Hey thanks for the mention! Here’s another pattern that might suit your needs” – not punting one of my own designs, but offering a sincere contribution to the conversation. That usually gets a positive response, and gets me insight into what customers are looking for.
Bonus exercise: dip your toes in Ravelry
If you aren’t already a regular Rav user, it’s time to explore.
– Find and join five groups (as well as Budding Designers and Designers!) that are relevant to your interests (whether personal or design-related). Lurking’s fine, you don’t have to chat, but read a few threads. Oh, and need it be said, we’d love to welcome you to https://www.ravelry.com/groups/mirandas-lounge.
– Organise your boards to put those new groups at the top of your home forums tab. Check in on them every day for a week.
– Add your current projects. Link the yarn you’re using and note the needle size, this is the main reason I start a project page for every single design I start noodling with. (I won’t make you add your stash. It’s super useful to do so – but for most of us that’s a major challenge in itself!) Oh, and if you’re knitting something from a pattern? Adding and linking projects is incredibly valuable for the designer. I’m just saying. They’ll love you for it.
– Do an advanced search for your current design concept. Use every filter to narrow it down as closely as you can to exactly what you’re making: the category, the shape, the fabric, the yarn. Interesting, no? So many patterns with the same criteria – but none of them are yours. There are plenty of ideas to go round.
Getting Started
posted on: April 1st, 2019
Are you ready to get moving towards your first design? The Paying It Forward design school kicks off right here, with the essential but sometimes overwhelming step of figuring out what your creation is actually going to be. We’ll look at developing your concept, deciding what publishing route to take, and making your pitch.
A little housekeeping first. All PIF posts are going to be cross-posted here and on Robynn’s blog (and are written by both of us together). They will appear every two weeks; each post will include a list of resources, our personal perspectives, and an assignment. The whole programme (seven topics) will run over three months, so if you work through it, you could have a published pattern by summer, or (since the last topics cover marketing and business questions) even sooner. We want to be clear that we are not professional coaches and this is not intended to be a professional coaching programme. We want to share our experience and opinions, and direct you to the many excellent resources available to help you get started in design (which include brilliant professional coaching!). There is a lot of help out there; we are here to help you find what you need. So let’s get started.
The whole series:
The preamble: So you wanna be a designer…
Step 1: From idea to pitch
Step 2: Charting and Ravelry
Step 3: Planning, grading and starting the sample
Step 4: Style sheet and layout
Step 5: Tech editing and testing
Step 6: Photography and Editing
Step 7: Pattern release and Marketing
Step 8: Managing your Design Business
Getting started
The very first step is coming up with an idea. Most likely you already have one – or many! Finding ideas isn’t usually the hard part. What can be hard is committing to one idea, out of the many; and getting past your self-doubt. A lot of people have told us they have trouble figuring out whether their idea is “worth it”.
What that often means is: is my idea original enough? Is there any point in adding another scarf pattern to Ravelry’s 50,000 scarf patterns? (That’s not hyperbole. It’s actually 50,270 at time of writing.) I (Robynn) strongly believe this is the wrong question. Originality is overrated – what matters is execution. And this is true in every creative field. There is very, very little truly new; if you worry about not copying anyone, you will block yourself from ever starting anything. If your idea is interesting enough to you that you want to make it, there’s no reason to think it won’t be interesting to other makers as well. The more you design, the more likely you are to create truly distinctive work, just as a natural expression of your developing style. But you can’t start there. Start with: do I like this?
Crafters are attracted to designs that are beautiful, and beautifully presented, and to patterns that they expect to be well written (meaning: clearly explained, error-free and delivering the same results they see in your sample). We’ll talk more about each of those aspects in later posts, but for now, focus on the design itself, and remember that a lot of things go into making the pattern “worth it” – none of which involve a unique and brilliant concept.
Who’s it for?
Besides the concept, figuring out how you want to publish is a key early-stage decision. Very broadly, your two options are self-publishing (with or without yarn support), or third-party publication (which could be through a magazine or book, a yarn company’s pattern collection, etc). Self-publishing offers the most flexibility and the most control, and the highest potential upside (if your pattern becomes a huge hit!); but it is also the most demanding in that you are solely responsible for absolutely every aspect. And, especially for your first patterns, it may well cost you more than you earn.
Third-party could be the right route if:
– You don’t have access to a suitable model for your planned design, or a good photographer
– You don’t have a budget for tech editing
– You’re inspired by a magazine’s upcoming theme and have just the right idea
– You don’t have time to knit the sample (assuming the publication offers sample knitters – not all do, and this will reduce your fee)
– You want the security of a defined fee (and potentially royalties from individual pattern sales later on)
– You already have some self-published patterns but want to get your name in front of a new audience.
On that last point, note that magazine exposure doesn’t always translate to people viewing your Ravelry page. You’ll need to consider the magazine’s editorial style (how prominently do they feature designers’ names?) and market. Online magazines such as Knitty may well deliver a bigger boost to your Ravelry views, even if the fee is lower.
Resources for third-party submissions:
Submission calls on Ravelry – search for “Call for Submissions”
Karie Westermann’s tutorial on creating magazine submissions
Andi Satterlund’s recent blog post (which covers a lot of the same ground as this series, and is well worth reading) also includes an example of a submission. Andi points out that fancy presentation isn’t as important as the content: tell the editors what they need to know and follow instructions.
Interesting thread on physical submissions.
Self-publishing could be better if:
– You aren’t able to commit to a firm deadline
– Your idea is likely to evolve as you go – don’t submit to a magazine unless you are sure you can deliver what you’ve pitched!
– Your idea isn’t a good fit for current submission calls
– You want your patterns to appear under a distinctive brand or style
– You believe your pattern can earn more through individual sales than a set fee (and are willing to risk earning nothing, or even losing money)
– You don’t yet have the body of work to convince magazine editors to hire you
It’s certainly possible to be accepted to a magazine without past experience. But editors will consider you a risk. You’ll have to try that much harder to convince them through your submission that you are professional and prepared. On the other hand, arguably, magazine publication is a better deal for newer designers, since your earnings from self-publishing are likely to rise over time. Still: for the purposes of this series, we’re focusing on self-publishing.
Self-publishing designers often seek yarn support – or what non-designers sometimes think of as “free yarn”. IT IS NOT FREE YARN. Whoops, sorry for shouting there. But this is crucial. Yarn support is a business deal. It’s a kind of collaboration; remember that from the yarn company’s point of view, you are providing pattern support. Meaning: your design is a solution to the problem of, what can I make with this yarn? That means that you, as the designer, have a responsibility to provide a sensible answer to that question. Don’t come up with a colourful design that calls for a small amount of each of six different skeins (unless you’re pitching it as a kit, and the yarnie is ready to provide smaller skeins for this purpose). Don’t ask for a luxurious, $40-per-skein hand-dyed cashmere for a densely cabled tunic. Sure, it may be gorgeous, but how many people are going to buy the recommended yarn? Is that fair to the dyer?
Taking yarn support comes with a big responsibility. You need to deliver what you’ve pitched, on time (chances are you’ve set your own deadline, but do consider your yarn supplier’s seasonal marketing plan, especially if the launch is tied to a big yarn show or other event); you need to keep your supplier informed of your progress; you need to deliver a pattern, and photos, that will represent both of you well; and you need to carry your weight on the promotional side. Cross-promotion is actually one of the best reasons to work with a yarnie – considering what you’re taking on with such a partnership, sometimes it’s better to just pay for your own yarn, but getting a boost from someone with a bigger social media audience than your own can be really helpful. But remember you need to do your part too. Even if you can’t deliver the same number of views, you need to put the effort in to market the design, and talk about why the yarn you received is exactly what the customer wants to use.
Exercise #1: Creating your pitch
Sketch your design, swatch it and create a proposal for yarn support.
There is a wonderfully comprehensive list of resources linked to in the Budding Designers group on Ravelry – browse and read! The Designers group also has a page of links to older discussions.
Flesh out your design ideas
This process is different for me (Emily) every time. Sometimes I have the yarn, and start with a small swatch to get an idea of how it works best. More often though, I have a pretty clear idea of what I want to achieve and will go and look for the yarn that will work best for the design. Remember that no-one is particularly interested in how good you are at sketching (and I am certainly no master) but you do need to record key design features and give an impression of how the finished garment will fit on the body. Even if you don’t need yarn support and so are sketching only for yourself, this step is key; you need to put some effort in to develop and record your ideas carefully.
If I am going to be submitting this somewhere, I will usually spend a little more time getting it to look nice, but as I am usually only doing sketches for my own benefit I don’t worry about my drawing skills that much.
Here’s an example of my sketch for the Monar Shawl:

Resources:
Bristol Ivy’s Knitting Outside the Box. I love the design exercises in this book – so good for actually coming up with ideas, and thoroughly enjoyed the workshop with Bristol on the topic.
Knitsonik’s books provide a wonderful, structured system for developing stranded colourwork ideas.
Croquis from My Body Model. I have a croquis that is generated based on my body measurements, and use this as a base for all my garment sketches. This website also provides free croquis based on real bodies of all shapes and sizes. If you want a more typical, exaggerated fashion shape, there are lots free to download (just search for “croquis”). The other option is tracing over a photo from a magazine or any other source.
Swatch (a lot)
Let’s be clear here, if you don’t like swatching, then you’re not going to like designing overly! I often work 4 or 5 swatches for a project, because I have learnt that it is better to figure out all those little details in advance of knitting the sample.
I usually end up doing something like the following:
– initial swatches to try out any stitch patterns and experiment with transitions between them. These don’t tend to be big, and I often rip them out if they aren’t working. If I have a yarn similar to what I intend to use for the final project then I will also try to work out what needle size to use. At this stage it is really important to keep detailed notes and sketch out charts of any lace pattern that you are using! You can never ever take enough notes.
– a submission swatch – as the distillation of all the previous process, this will be larger and neater. I will do proper garter stitch borders, go with my final stitch choices and try to illustrate how the final piece will look, and will weave in the ends and wet block the whole thing. So if I’m proposing a crescent shawl, I may well make a crescent-shaped swatch rather than a square one. (This isn’t the swatch you’ll use for calculating gauge; that comes once you’ve received your yarn, and will be bigger still.)
Resources:
An example from Hunter Hammerson about how many swatches she makes for a hat.
This series of swatches I made for the design I am currently working on.
Any number of stitch dictionaries; there are many, both online and in print, to use as a basis for using and combining stitch patterns.
Work out yardage
By this stage you should have a good idea of what you are going to knit and how big it is going to be. Next you need to work out how much yarn you are going to use for the final design so that you can put in a proposal for yarn support.
First weigh your swatch, as accurately as possible. I have a small set of cheap scales that weigh to the nearest 0.01g (these are usually sold as jewellery or letter scales). Then calculate the area of your swatch, and the area of the final design. Then:
weight of sample = weight of swatch * area of sample / area of swatch
At this stage I would add on an extra 20% allowance.
Create your submission
Bring all this together into one document, preferably on one page of a pdf. Be sure to include your contact details (email and postal address at a minimum) on each page. Use a good, well-lit photo of the swatch, the sketch of your design and a few notes on construction details, as well as the sizes that will be offered. Also make sure to include details on the final choice of yarn – the base, the colours and the number of skeins for each size.
Remember to put some thought into your cover email as well. As with any cover letter, you can do worse than follow the Inigo Montoya principle: “Hello, my name is Inigo Montoya (introduce yourself). You killed my father (establish a personal connection, or tell them why you are approaching them specifically). Prepare to die (call to action).”
Resources:
A guide to creating a submission (aimed at submitting to a magazine, but the basis is useful here).
A thread with lots of examples, and this editor’s perspective from Alex Tinsley – covers magazine as well as yarn support pitches, and includes the tricky cover email.
Next posts:
2. Style sheet, pattern writing & layout
3. Grading, charting, planning
4. Photography & editing
5. Tech editing & testing
6. Pattern release & marketing
7. Project & business management, final questions
Paying it Forward – a follow up
posted on: March 12th, 2019
We’ve had a huge response to our offer – from others on the design and yarn side, wondering if they can help, to enthusiastic comments from would-be designers, to actual applications. Some of those responses are common enough to invite their own public response! So here are a few points to note.
For now, this offer is for just one person – and remember, it is specifically intended to boost inclusion of BIPOC designers.
Although we would love to help many more people, we are taking care not to over-commit. (See the bottom of the original post.) We will be selecting one applicant to work with at this point. After seeing them through to their first published pattern, we’ll assess what comes next. But right now, it’s just one.
We know that exclusion can take many forms, and we don’t want to be comparing oppressions, but this is specifically about racism. Bluntly, we are not going to reinforce the status quo by choosing a white applicant over a POC. But! There is plenty of help available for all newbie designers – see point 3.
We are keeping track of offers of help and considering ways to leverage them – but there’s nothing stopping anyone from making their own offer.
It’s great to know there are so many people ready and willing to contribute. Again, after the initial phase, we’ll reassess and maybe find a way to involve more helpers, but it’s far too early to say. In the meantime, note that specific offers (e.g. “I can offer test knitting” or “I can advise on photography”) are the most helpful.
There are SO MANY great resources for people wanting to start on their design journeys. You don’t have to wait for us, or for anyone.
Our top recommendation for any new designer is to join the Budding Designers group on Ravelry. It’s a very friendly, encouraging, supportive space with discussion of a huge range of topics, and we both follow the discussions on there. Chances are excellent that you’ll find a thread on whatever question you have, and if you don’t, you can ask and expect helpful answers. They also maintain a list of Technical Editors that are happy to work with beginner designers.
The separate Designers group is also (in my experience) very helpful and supportive, but more geared towards experienced designers – though that doesn’t necessarily mean wildly successful. I would advise newbies to go to BD first with questions, but to read the Designers archives for very useful perspectives.
Kate Atherley’s Beginners Guide to Writing Knitting Patterns is also excellent. Top designers Shirley Paden and Deborah Newton, among others, have written great books on designing (mostly) garments, but Kate tackles the problem of how to actually write it down – not to mention grading, layout, copyright… basically everything you need to know.
That is barely scratching the surface of all the resources out there, but it’s already enough to get you well on your way.
We are excited to have tapped an apparent need, and are both really, really looking forward to making new friends as we work with future designers. But remember that you don’t need us specifically. There’s already more support out there than you realise!
Paying it forward
posted on: March 9th, 2019
If you want to try designing, but wish you had a sounding board or design buddy to help you get there, maybe we can help?
We (Emily and Robynn) are long-time internet friends, having first connected via Ravelry and really bonded through motherhood and our separate ventures into design. We have collaborated on various projects, including the ‘Lost in the Woods’ collection. Between us we make a pretty good team, with complementary strengths and professional skills that we put to good use as self-publishing designers.
In reflecting on the recent conversations around racism and in the knitting world, we tried to focus on how we personally could contribute to greater inclusion. We realised that in starting out as designers, we benefited from a tremendous support network, formed online and at knitting events. We had access to many more advanced designers, tech editors, yarnies and eager knitters who were happy to share their insights and advice, and even to work with us as we grew in confidence and ability. Without this pool of expertise and encouragement, it would all have been so much harder.
It is clear that not everyone has been afforded the same welcome. So we would like to pay it forward, by mentoring an aspiring designer to get their first pattern published. Wonder dyer Aimee has generously offered yarn support for an accessory design (1–3 skeins), and we’re ready to help with everything else. What does this offer involve, exactly? Well, that depends on you. Together we will agree on what support would be most useful to you, but it could include sharing ideas on how to write a proposal for yarn support or a magazine submission; developing a style sheet and pattern template; advice on grading and pattern writing; drawing charts and schematics; tech editing, romance writing and providing some pointers on photography and photo editing. (Admittedly photography is the area where we have the least expertise, but we have still picked up a fair bit of knowledge along the way!)
What can we offer?
Robynn has an amazing eye for style and detail, as well as being a super hot editor who can lay out a book, set up a mean template or write the perfect romance copy from a list of words. Emily has a brain that thinks in numbers and concepts, can engineer a solution to just about any problem and loves nothing better than an over-complicated spreadsheet to get her teeth into.
We know you have the skills and the talent. But we also know we would have struggled without the network that came easily to us, and which we now realise is not so readily available to everyone. We’re hoping to open the doors just a bit wider.
How do you apply?
Please email us at flutterbyknits@gmail.com, by 24th March 2019, with a short answer to the following questions:
What would you like to design?
What is holding you back from self-publishing a pattern?
What three things would you most like us to help you with?
Where can we find you online? Please link to somewhere that shows your knitting projects – such as Instagram, Ravelry or a blog.
While we are not setting hard and fast entry requirements, this opportunity is specifically meant to encourage greater diversity and the participation of BIPOC in the design world. Please reflect on this before you apply. You’ll find our answers to some of the most common questions here.
Why the formality?
We think that creating a proper structure, discussing what is needed at each step of the design process and where we can best add value, should mean more productive collaboration than a vague offer to answer questions. On top of that, we don’t want to let anyone down by taking on more than we can handle. Both of us have jobs and kids, as well as our own design projects, and we know how quickly commitments can turn to overload. So we will start out working with just one person, and defining exactly how we will help at the start of the process.
We’re not trying to make this an exclusive program, and we certainly hope to engage with the people we’ll get to know through this project beyond these boundaries. (Yes, ‘people’ – we also hope to repeat the exercise in the future with more designers). Setting some limits just mens we can be sure we’ll make good on our promises.
The evolution of a swirl hat.
posted on: November 20th, 2018
I have been looking forward to being able to publish this post for what seems like a very long time. Earlier this year I was asked by Kate Davies if I would like to design a hat for her new book, Millarochy Heids. I was of course delighted, especially as she was excited by an idea that I’d had swirling in the back of my head for a while now.
I have been slightly obsessed with swirl crown hats for a few years now. Roisinis was my first experiment with this construction, with only one yarn and a textured pattern on one side. I was captivated by the swirl though, the perfect amount of body and slouch, that never ending surface, I loved it.
Then I started experimenting with the construction a bit more. Trondra takes the two layered concept a bit further. On the outside there is a graphic stranded colour work design, using shetland yarn to keep your ears perfectly warm while the lining is knit from a soft laceweight yarn for the ultimate in comfort.
Drumashie was another play on texture – the open lace knit in a fine mohair/silk blend was my interpretation of Old Man’s beard through the medium of knitwear. The double layered construction lends itself to this perfectly, with the dark pine green peeking through that delicate cloud like top layer.
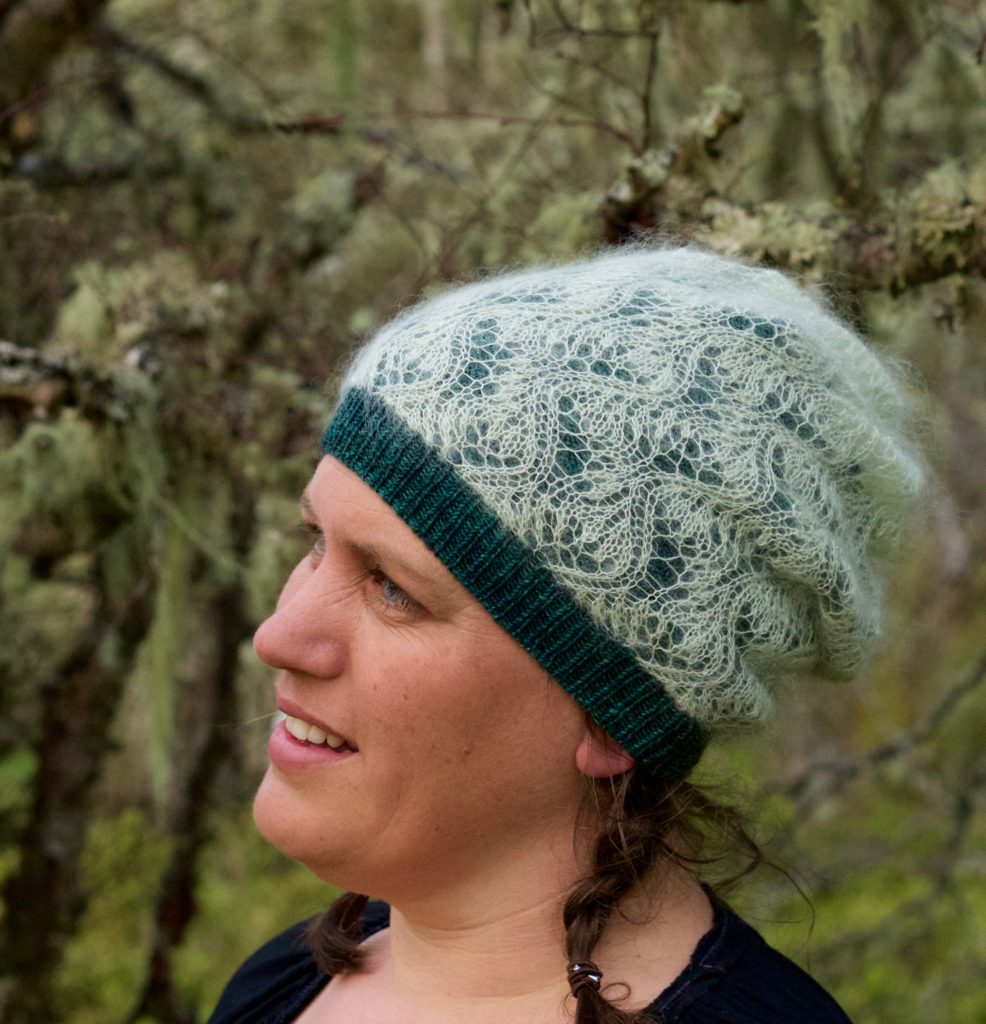
And then I started pondering double knitting – could I make a beautiful swirl crown that ended up with a double knit border to weave those layers together? Would it work within a book? I mean, it’s not the usual sort of pattern you see in a published collection. When tentatively ran the idea past Kate I was bowled over by an enthusiastic response, and much swatching later, Tarradale is the result.
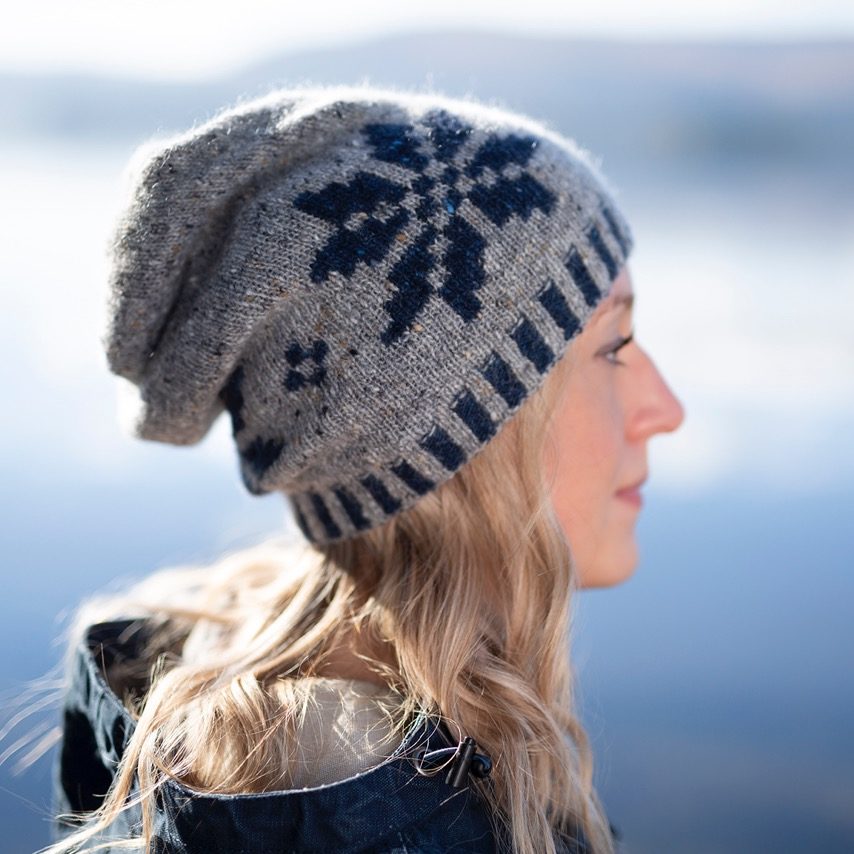
Double knitting presents both opportunities and challenges when designing. My early ideas involved a really big complex star pattern, but as you can’t play with the colour dominance at all the fine lines were undefined and lacked the graphic quality I was looking for. So instead I took a much simpler motif and enlarged it. Because there are no strands, the double layered fabric is stretchy as well as warm and squishy, even with those long gaps between the colour changes.
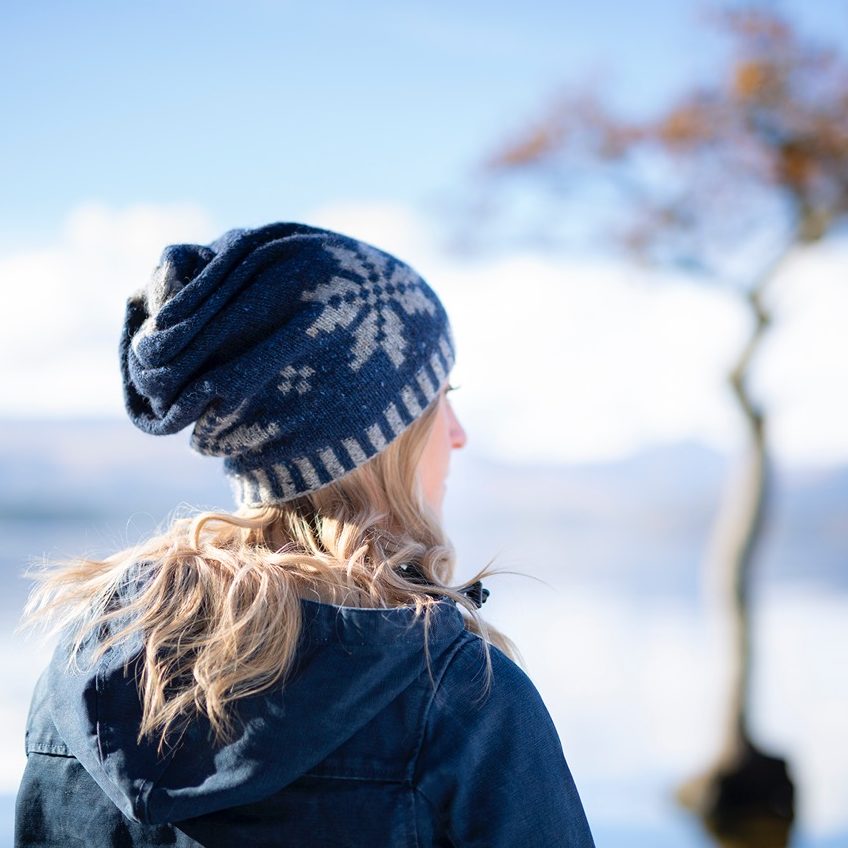
This ticks so many boxes for me. The hat is perfectly reversible, even the ribbing is double sided. The yarn is just lovely, after blocking it transforms into a fabric that is both resilient and soft at the same time, with enough body to make the swirl really stand out. I love the bold simplicity of the motif, rendered in those big blocks. It was a challenging design (possibly because it was the first time I have ever actually done double knitting, and deadlines are not your friend when you are experimenting with a new technique) but now that I have seen these photos I am totally convinced that it was worth all that effort.
Having seen some of the designs that have been released so far, I’m honoured to have my hat included in such a wonderful collection, and am looking forward to seeing the rest of the patterns – thanks Kate!
How to fix a mistake in Lace Knitting
posted on: November 14th, 2018
This technique is useful for fixing bigger mistakes in your knitting. In this example the yarn overs in the central repeat of the swatch are misaligned and I have managed to knit 12 rows before noticing.
How to fix a mistake in Lace Knitting from Emily williams on Vimeo.
Shetland Wool Week: Part 2: Knitting
posted on: October 10th, 2018
This year I was pretty exhausted by the time I made it to Shetland, and was glad to have planned a nice chilled out week. One of the things I was looking forward to was actually getting a serious amount of knitting done – I had seriously lost my mojo over the summer.
We had a fantastic flat, which was just the perfect place for a good knit and natter.

There were cafe’s to knit in.
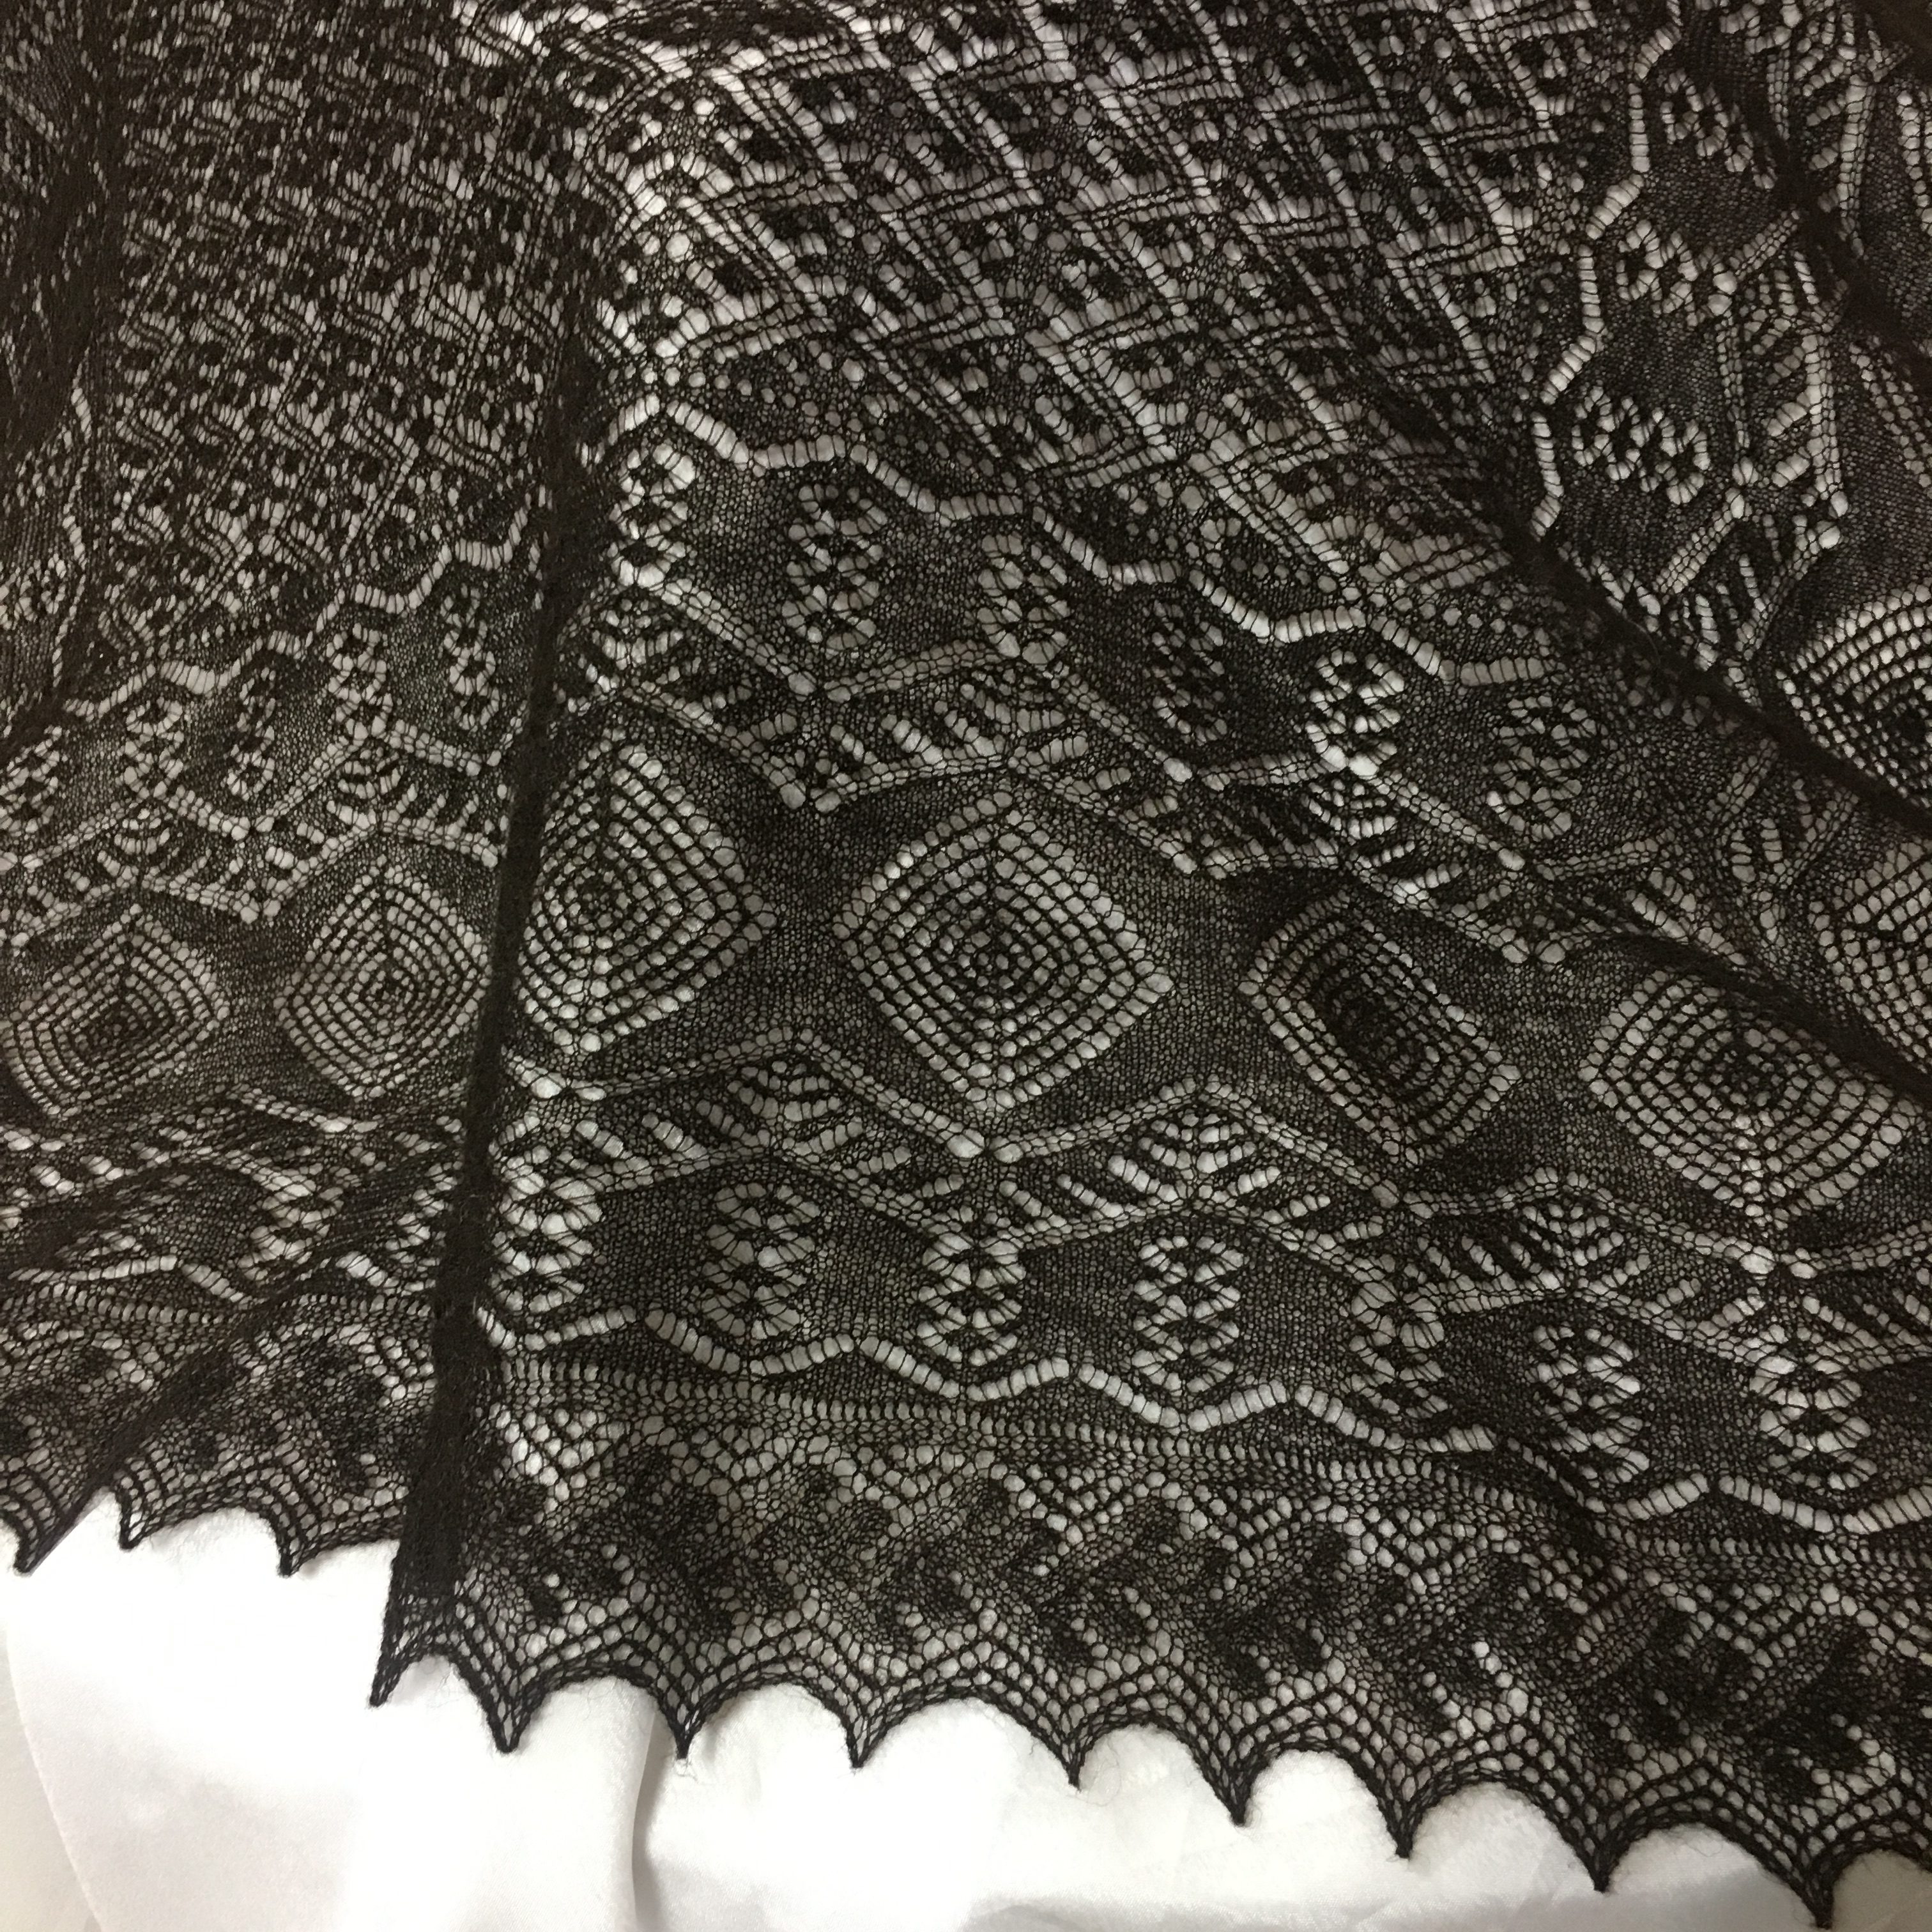
There was an almost endless array of amazing knitwear to look at for inspiration!
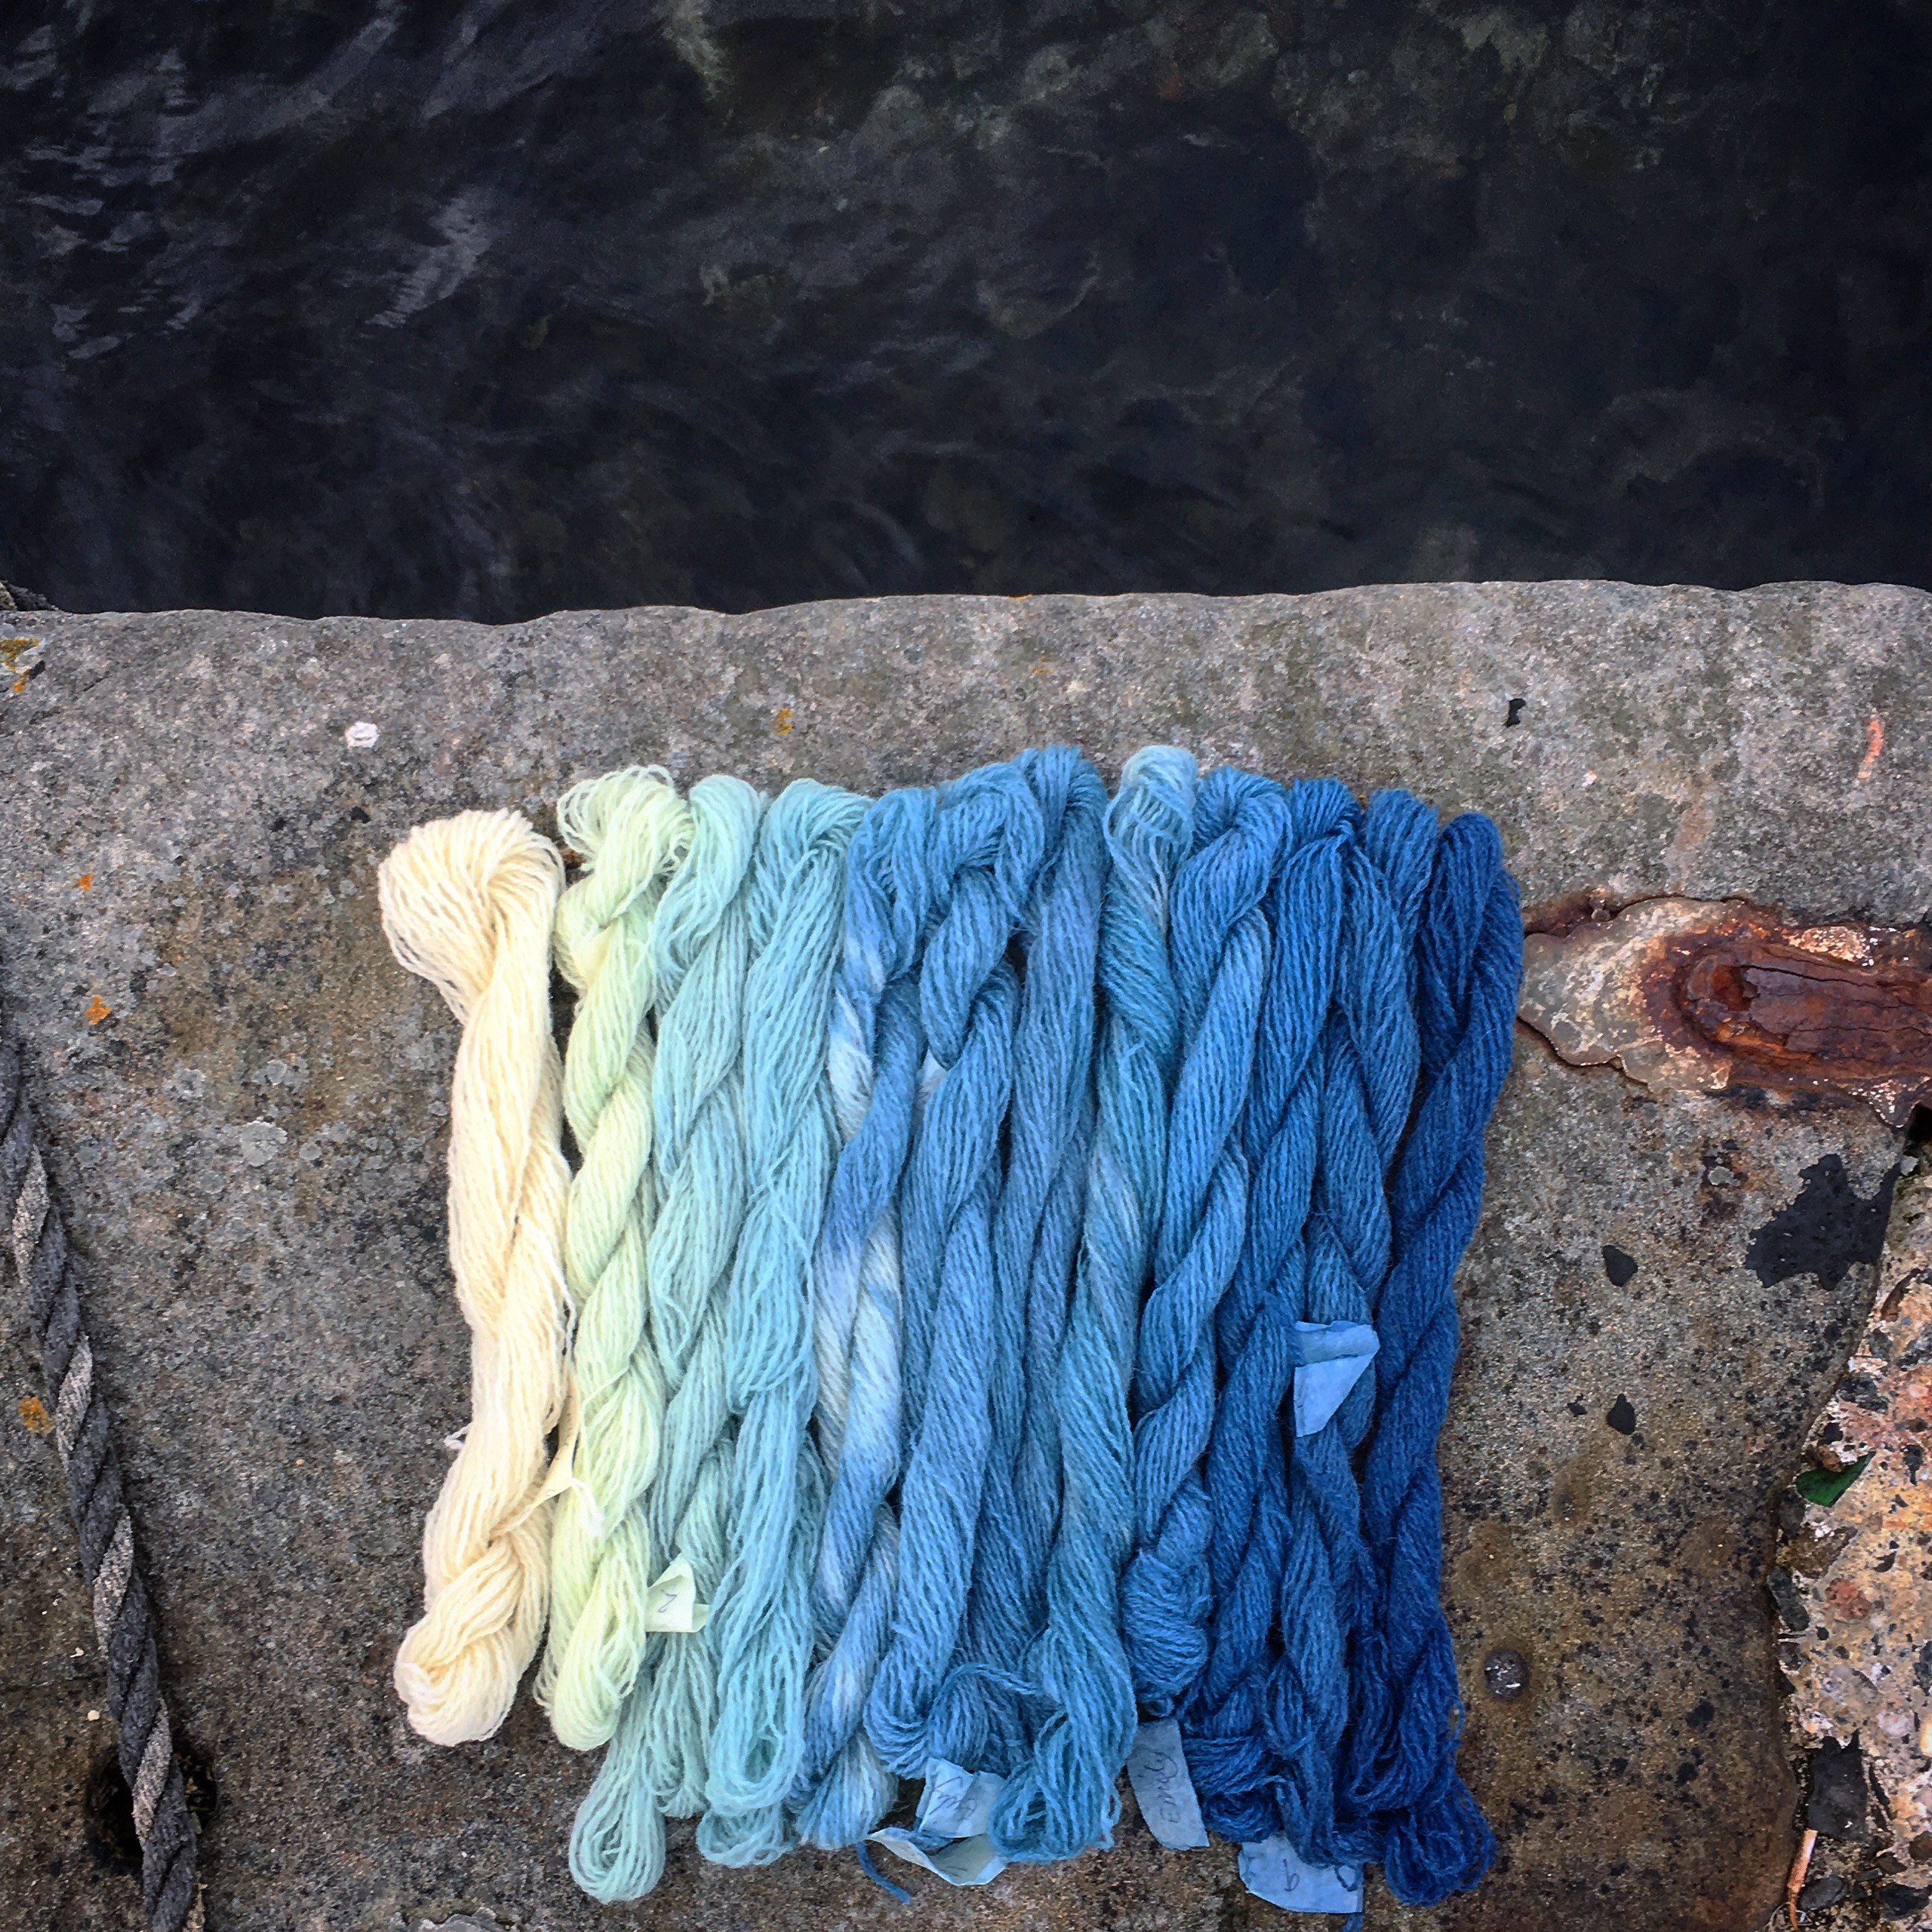
And then of course there were the classes – one of mine was on dying an indigo gradient, the products of which I am very much looking forward to making something with.